
This 2-ingredient vegan Greek yogurt made in the Instant Pot is thick, tangy, and creamy. It's smooth and spoonable with that classic Greek-style richness and a subtle tang that makes it perfect with fruit, granola, or any way you like it.

This high-protein recipe comes from Chew on Vegan, who adapted it from Plant-Based Dads, and it works like a charm.
I've tried other vegan yogurt recipes before, and they sometimes turned out watery or weird-tasting. But this one? Perfect every time. Thick, tangy, creamy - everything you want in Greek yogurt.
The return on investment in making your own is awesome. You spend less than 5 minutes putting it together, then the Instant Pot and refrigerator do all the work. Plus, you only buy Greek yogurt once - after that, every batch costs just the price of the two cartons of soy milk. Big money savings and huge time savings.
Jump to:
Why This One's on Repeat
- Budget-friendly - Just Trader Joe's organic soy milk and a one-time Greek yogurt starter, then you're set forever
- Self-perpetuating like sourdough starter - Save ¼ cup of the whey (water that separates off) to make your next one, so you never buy yogurt again
- Perfect for weekly meal prep - Make a big batch every Sunday and have breakfast sorted for the entire week
- Nothing goes to waste - The leftover whey (the watery liquid) not only becomes your starter for the next batch, but can be used for other recipes
- Probiotic and protein-rich, and gut-healthy - The live cultures that are good for your digestive system
- Takes 5 minutes of active work - The fermentation does all the heavy lifting while you enjoy your day and sleep
Shopping List

Soy Milk: You must use plain soy milk with only two ingredients - water and soybeans. Avoid any soy milk with added sugar, sweeteners, thickeners (like carrageenan or guar gum), oils, or flavorings. These additives interfere with fermentation and prevent the yogurt from setting properly. I use Trader Joe's Organic Unsweetened Soy Milk in the shelf-stable cartons (found in the beverage aisle, not refrigerated).
Yogurt Starter Note: I've only used Kite Hill Greek-Style Yogurt as the starter. It works perfectly every time because it has the right live active cultures. While other vegan Greek yogurts might work, I can't guarantee results with brands I haven't tried. Make sure whatever yogurt you use contains live active cultures (check the label). After your first batch, you're done buying yogurt forever. Save ¼ cup of the whey that separates off - as your starter for the next batch. It's self-perpetuating.
See the printable recipe card for quantities and a full ingredient list.
Equipment
I have an Instant Pot Duo Evo Plus 10-in-1, but any Instant Pot with a yogurt setting should work.
I make this often, so I invested in a Yogurt Maker with Ultra Fine Mesh Strainer Basket. Alternatively, use a cheesecloth or butter muslin lined in a regular strainer or a nut milk bag placed over a bowl.
How To Clean Your Instant Pot for Yogurt
Clean equipment is critical for successful yogurt fermentation. Any bad bacteria can potentially interfere with your cultures and prevent the yogurt from setting properly. Here's how to prep your Instant Pot inner pot:
Method 1: Steam Sterilization
- Add 2 cups of water to your clean Instant Pot inner pot.
- Place the pot in the Instant Pot base and close the lid.
- Select "Steam."
- Let it run for 2-3 minutes, then open the Instant Pot. Carefully remove the inner pot (it will be hot!) and dump out the water.
- Let it air dry completely or dry with a clean towel. It should be completely cooled before starting the yogurt.
Method 2: Hot Water Rinse
- If you have super-hot water, as I do in my house, rinse the inner pot thoroughly with very hot water. Clean the lid too.
- Let it air dry or dry with a clean, freshly washed towel.
Let's Make Vegan Greek Yogurt
Follow the recipe below after thoroughly cleaning the pot. See the complete printable recipe card below for the details.
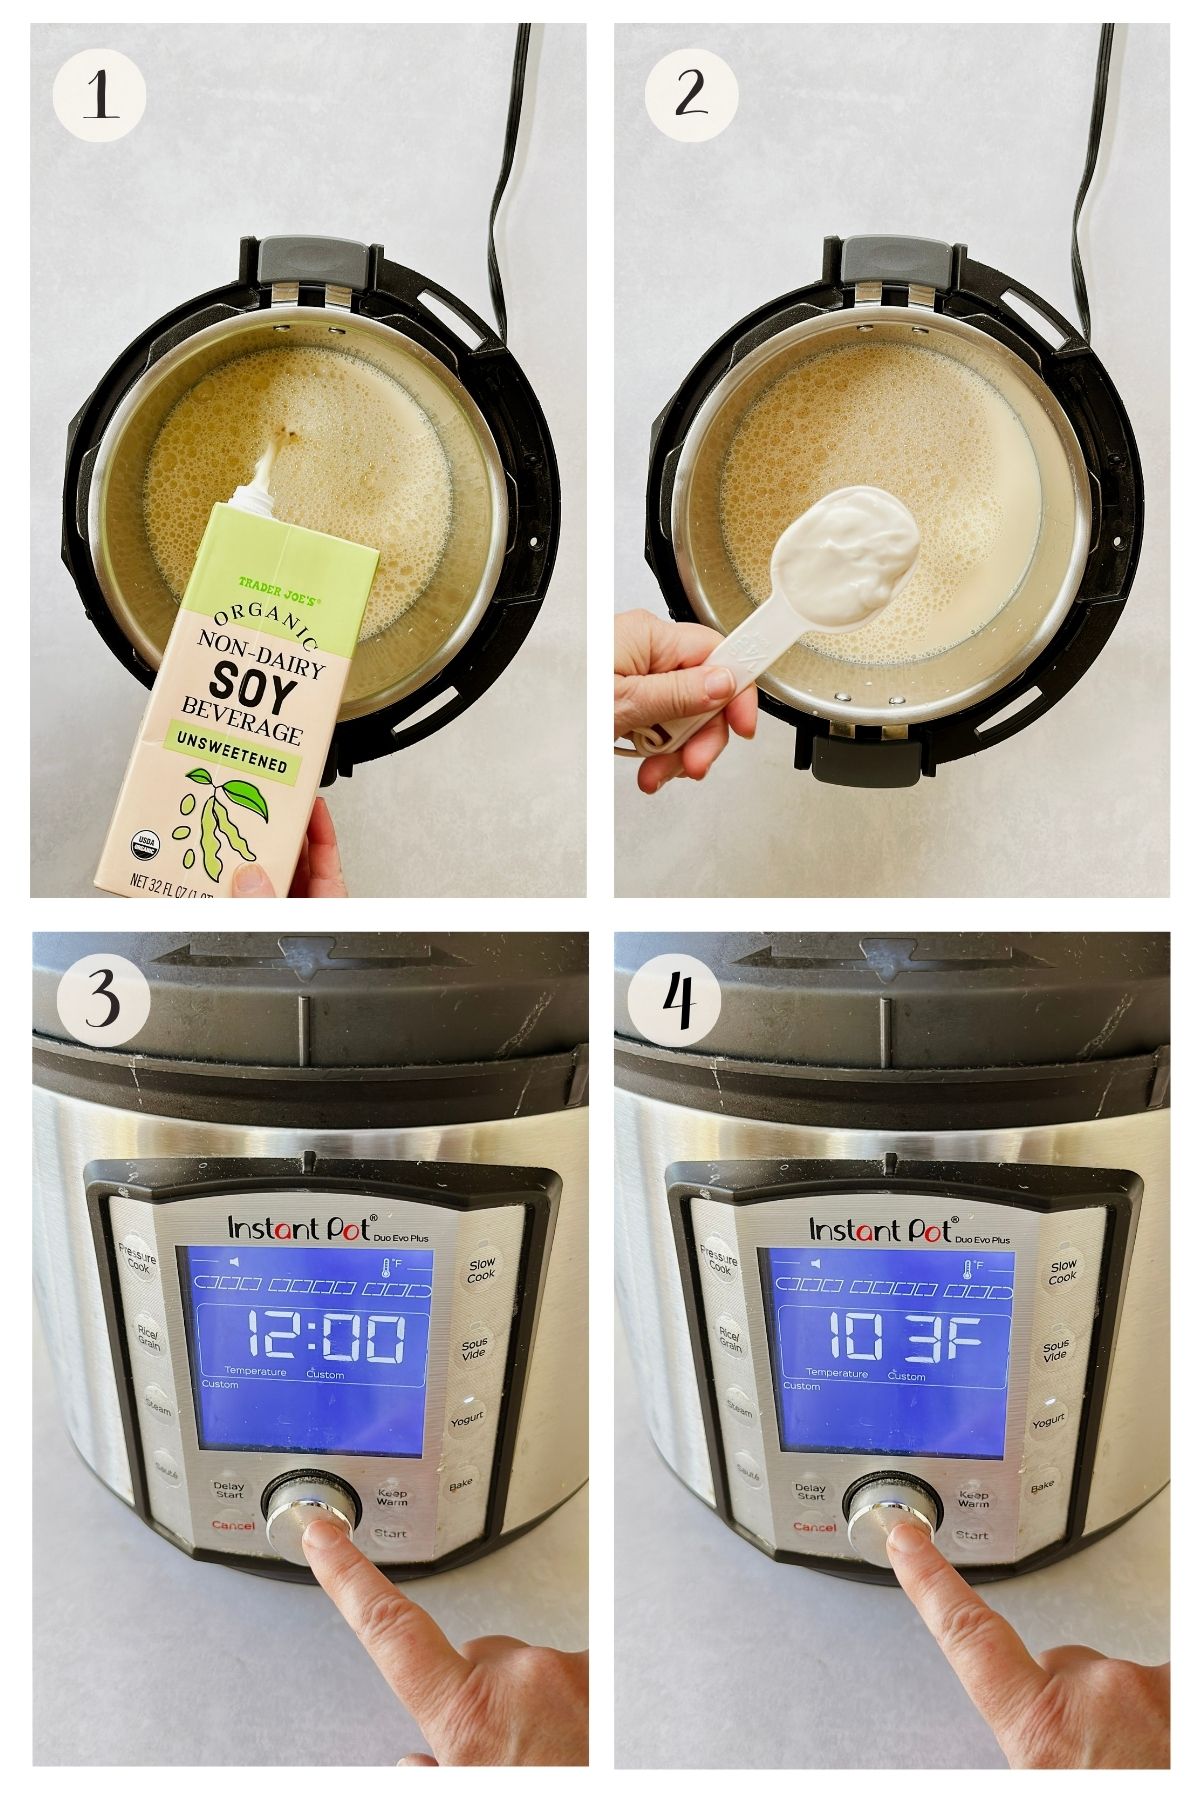
Step 1: Pour the unsweetened soy milk into the Instant Pot inner pot.
Step 2: Add a spoonful of vegan Greek yogurt starter and stir to combine.
Step 3: Press the Yogurt button and set the time to 12 hours.
Step 4: Adjust the temperature to 100-105°F.
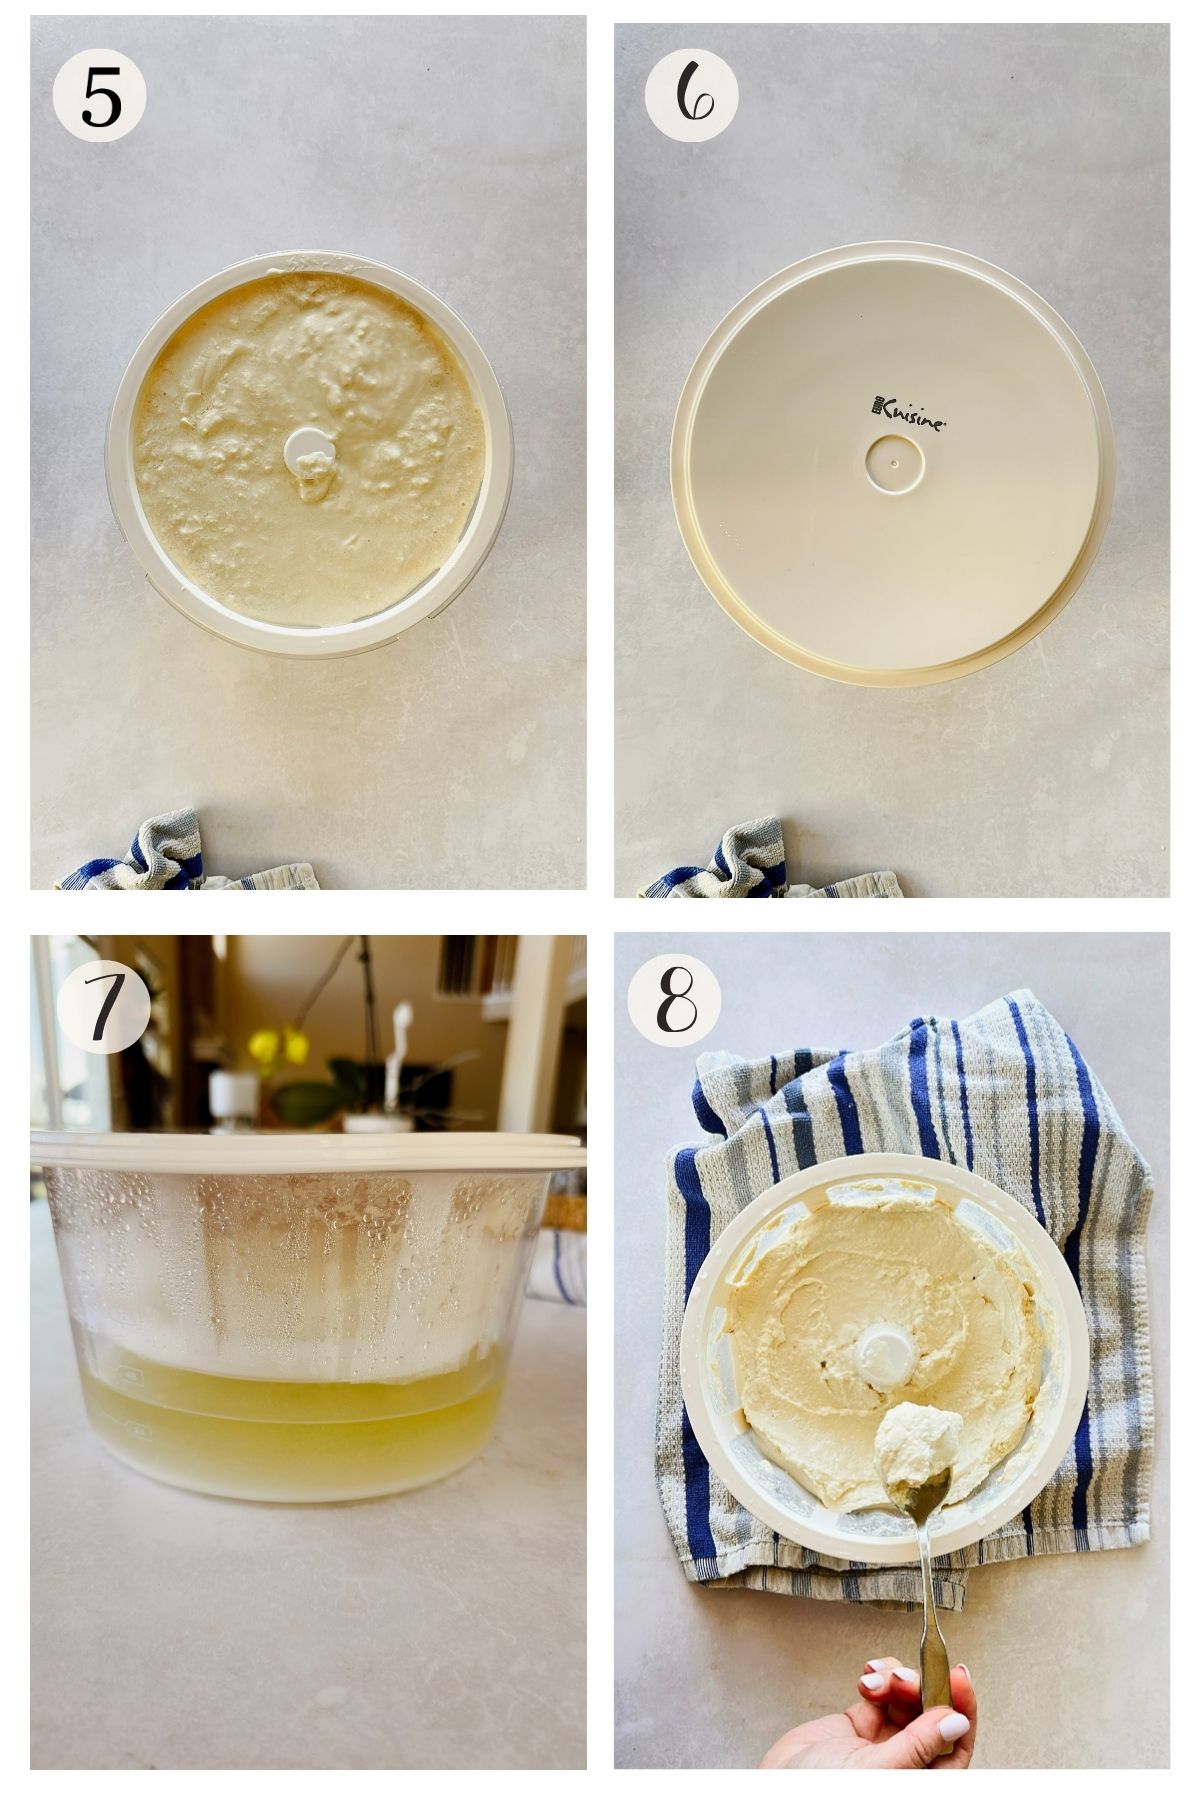
Step 5: After the cycle is complete, transfer the yogurt to strain. Use a fine mesh strainer like the one shown, or simply drape cheesecloth over a large bowl and pour the yogurt in - no strainer needed. Let it drain to release the whey and thicken up.
Step 6: Cover the container with a lid and refrigerate for 24 hours, up to 48 hours for thicker Greek-style yogurt. You can do less time, but it won't be as thick.
Step 7: After chilling, you'll notice whey has separated and settled at the bottom. Separate ¼ cup and freeze for your next batch.
Step 8: Remove the lid to reveal your thick, creamy vegan Greek yogurt, ready to scoop and serve.
Top Tips
- Use plain soy milk with only water and soybeans in the ingredients - no additives, thickeners, or sweeteners. I use Trader Joe's organic soy milk in the shelf-stable cartons (found in the aisle, not refrigerated).
- Temperature is everything. Your Instant Pot needs to be around 100-105°F (37.8-40.6°C).
- Longer fermentation makes a tangier yogurt. Do 8-10 hours for mild flavor, 12-14 hours for that classic Greek yogurt tang. I recommend 12 for that perfect Greek flavor.
- Always freeze ¼ cup of the liquid (whey) from each batch for your next batch.
- Don't disturb it while fermenting. No peeking, no stirring, no shaking. Let the cultures do their thing undisturbed.
- The whey, that watery stuff that separates, is packed with probiotics and works as a starter, plus you can use it in smoothies or baking.
- I strain between 24 and 48 hours for extra thickness, but you can do anything after 12 hours if you don't want it extra thick.
- Clean equipment matters. I use my Instant Pot for many things, so I like to make sure the Instant Pot, spoons, and containers are squeaky clean to avoid introducing bad bacteria.
How To Use the Leftover Whey
- Freeze ¼ cup for your next batch of yogurt.
- I use about ½ cup in place of almond milk in my smoothies. The tang is yummy, and it adds some extra probiotics. The sourness actually cuts through some of the bitterness from spinach or kale in smoothies like the Homemade Vegan Mango Kale Smoothie.
- Substitute for buttermilk in recipes, using 1:1 in any recipe that calls for vegan buttermilk.
- Make a probiotic lemonade by mixing it with lemon juice, water, and a drizzle of maple syrup. It's like homemade kombucha but easier.
- Swap it 1:1 for whatever milk you'd normally use in pancakes and waffles.
- Works great in vegan banana bread, zucchini bread, and muffins. Keeps them moist.
Storage Ideas for the Soy Whey
- Ice cube trays - Freeze in cubes (each cube equals ~2 tablespoons) for easy smoothie additions
- Mason jars - Refrigerate for up to 7-10 days
- Larger portions - Freeze in 1-cup portions for baking projects
Serving Suggestions
- I add ¼ cup of the yogurt to my morning smoothies with Costco's frozen smoothie berries and greens, protein powder, flax or chia seeds, and water (or some of the whey) for an easy, filling breakfast.
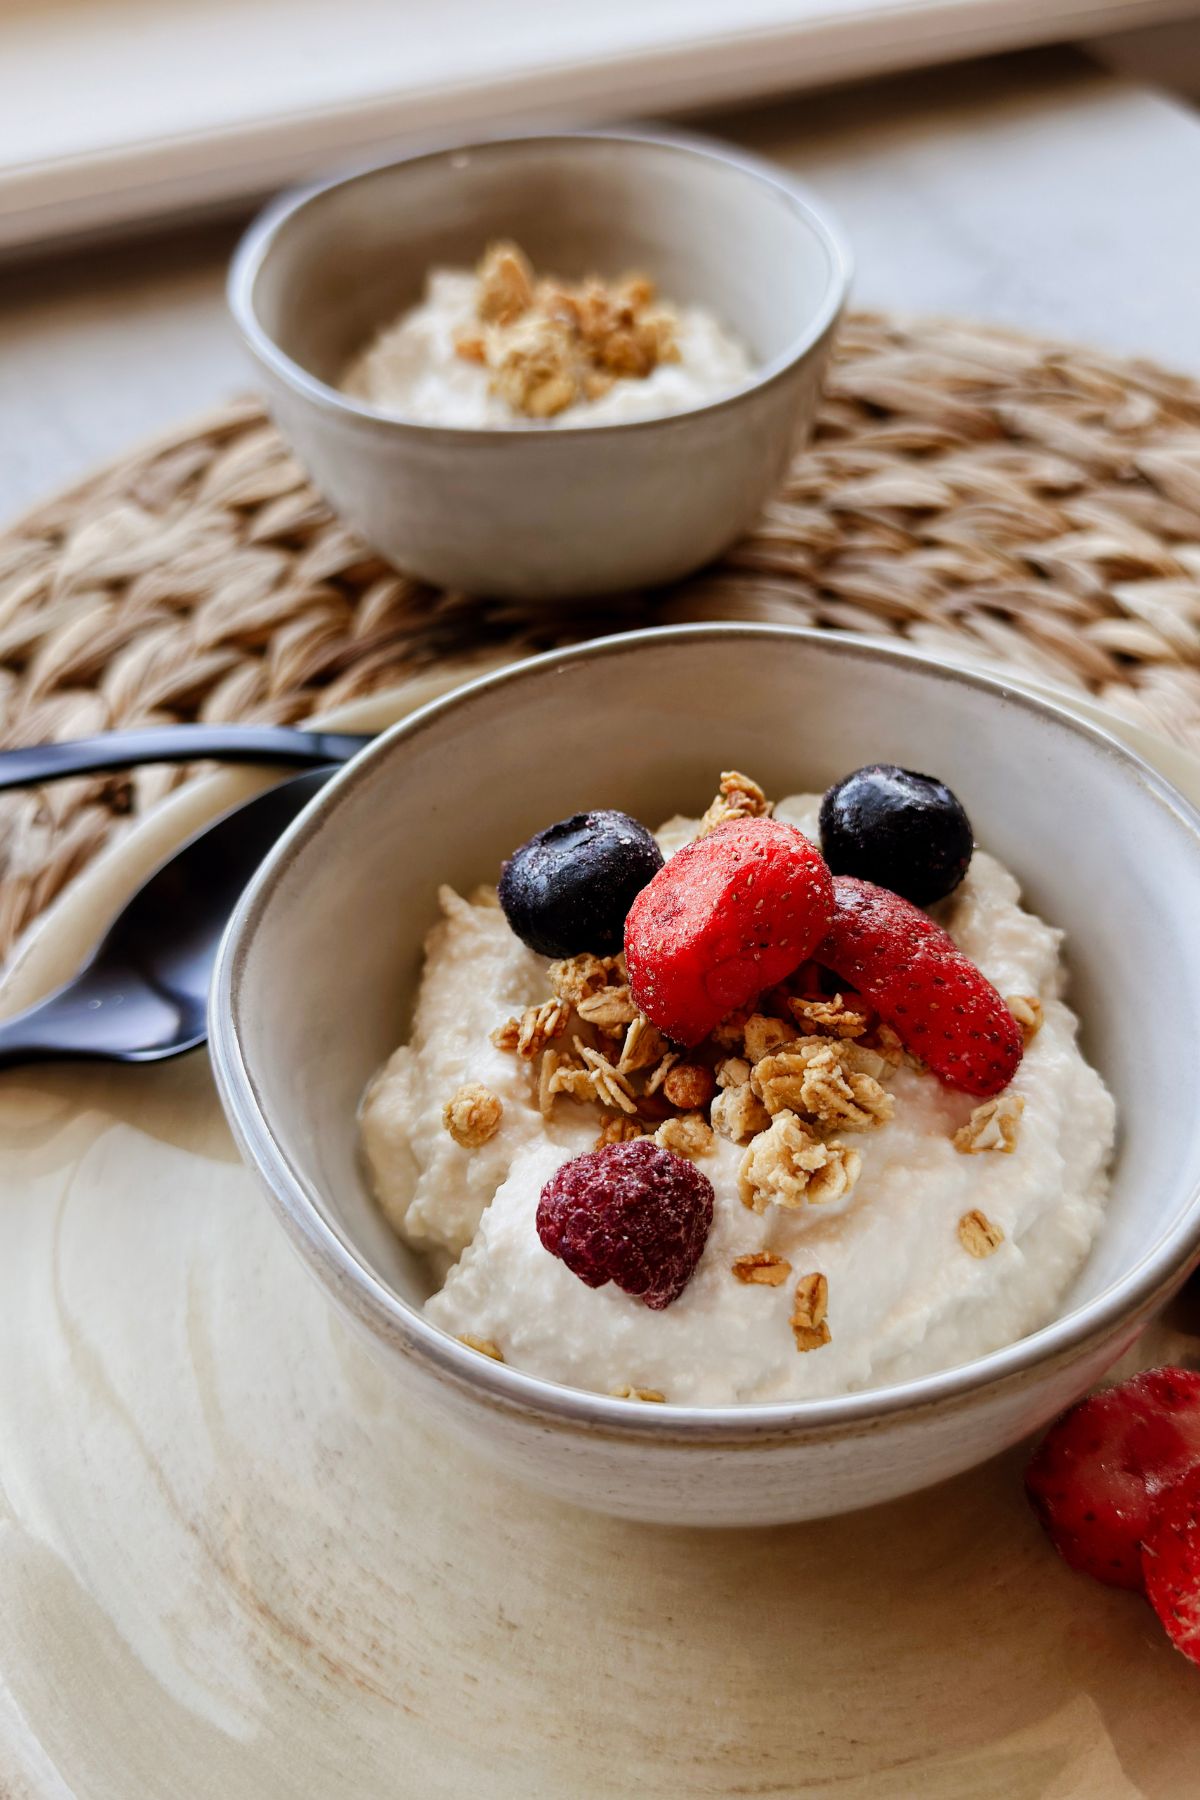
- Mix with a little maple syrup and top with granola, fresh berries, and sliced banana for a delicious snack.
- Add it to a Vegan Chocolate Pudding Parfait.
- Stir into oats with your favorite mix-ins for creamy, tangy overnight oats like Vegan Banana Cream Pie Overnight Oats.
- Make an easy vegan Tzatziki sauce or use it as a sub for the vegan mayo in homemade 5-Minute Vegan Ranch Dressing or Vegan Thousand Island Dressing.
- Use instead of sour cream on baked potatoes or loaded potato bowls.
Recipe FAQS
You only need ¼ cup for your next batch, so use the rest in smoothies, as the liquid in bread or pancake recipes, for cooking grains, or in salad dressings. It contains beneficial probiotics and adds a subtle tang to anything. I freeze mine in ice cube trays for easy smoothie additions throughout the week.
Soy milk works best because it has the most protein, which creates the thickest, creamiest texture. Other plant milks (almond, oat, cashew) can work, but you'll need to find another recipe becasue I've never tested it.
I've only tested this with Kite Hill Greek-Style Yogurt, which works perfectly every time. Other vegan Greek yogurts might work, but make sure they contain live active cultures (check the label). I can't guarantee results with brands I haven't tried.
Common issues include that the temperature was too hot or too cold, the soy milk had additives, the starter yogurt had expired, or it didn't have live cultures. Make sure you're between 100 and 105°F to maintain warmth during fermentation.
Yes! Just use one 32-ounce carton of soy milk and 2 tablespoons of the yogurt starter. The process and timing stay the same.
Super common and totally fixable! The proteins in soy milk can clump slightly during fermentation if the temperature fluctuates - it doesn't affect flavor or safety at all. I just leave it, but if you want, just blend it smooth with an immersion blender for about 30 seconds, either before or after straining. For the silkiest result, blend after straining once it's already thick. Next time, make sure your Instant Pot lid is fully closed and leave it completely undisturbed for the full 12 hours.


Drop a comment and tell me how this Vegan Greek Yogurt turned out! Was it love at first bite, surprisingly edible, or a full-on yuck? And if my directions helped (or didn't), please let me know so I can keep improving these recipes for you.
Follow me on Pinterest, Instagram, Facebook, and YouTube for inspiration.
Recipe Card

Vegan Greek Yogurt
Ingredients
- 2 32-ounce cartons soy milk must have no additives, sugars, or preservatives. I use the Trader Joe's shelf-stable organic soy milk cartons.
- ¼ cup unsweetened Kite Hill Greek Yogurt
Instructions
Step 1: Clean your Instant Pot
- Clean equipment is important for successful yogurt fermentation, as contamination may interfere with fermentation. Here are two suggestions to clean it thoroughly:Steam Method: Add 2 cups of water to the inner pot, close the lid, and steam for 2 minutes in the Instant Pot. Dump water and let air dry or dry with a clean towel.Quick Method: Rinse the inner pot and lid thoroughly with very hot water. Dry with a freshly washed towel.
Step 2: Ferment
- Pour all 64 ounces of the soy milk and ¼ cup of Greek yogurt into your Instant Pot inner pot. Stir and close the lid (valve can be open or closed).
- Select the "Yogurt" function and set to 100-105°F (37.8-40.6°C) for 12 hours undisturbed.
Step 3: Strain for Thickness
- After 12 hours, the Instant Pot will beep. The yogurt will look set but thin.
- Line a large bowl with cheesecloth or a nut milk bag and place it over a large bowl. I recommend using this great yogurt strainer if you plan to make it often.
- Pour the yogurt into the strainer.
- Cover with a clean towel or lid and refrigerate for 24-48 hours. Forty-eight hours gives you super-thick, authentic Greek yogurt texture. If you want it thinner, strain for less time (24 hours for medium thickness, 8-10 hours for regular yogurt consistency).
- The whey will drain into the bowl below. Save ¼ cup of the whey for your next batch. Store in the freezer.
Step 4: Store and Enjoy
- After straining, transfer the thick Greek yogurt to a clean jar or container. Store in the refrigerator for up to 7-9 days. For super-smooth yogurt, blend with an immersion blender for 30 seconds or whisk before storing.*


Vger says
Five minutes of hands-on work, twelve hours of patience, and I had the thickest, tangiest vegan Greek yogurt I've ever tasted — after straining, the texture was so thick and creamy it could pass for the real thing. The fact that you can keep saving whey from each batch makes this one of the most practical recipes on this site.
Regi Pearce says
Thank you! Glad you liked it.
Regi Pearce says
Two ingredients, my Instant Pot, and I haven't bought yogurt since. I put in about 30 hours to get that thick, spoonable texture. Trust the process!