
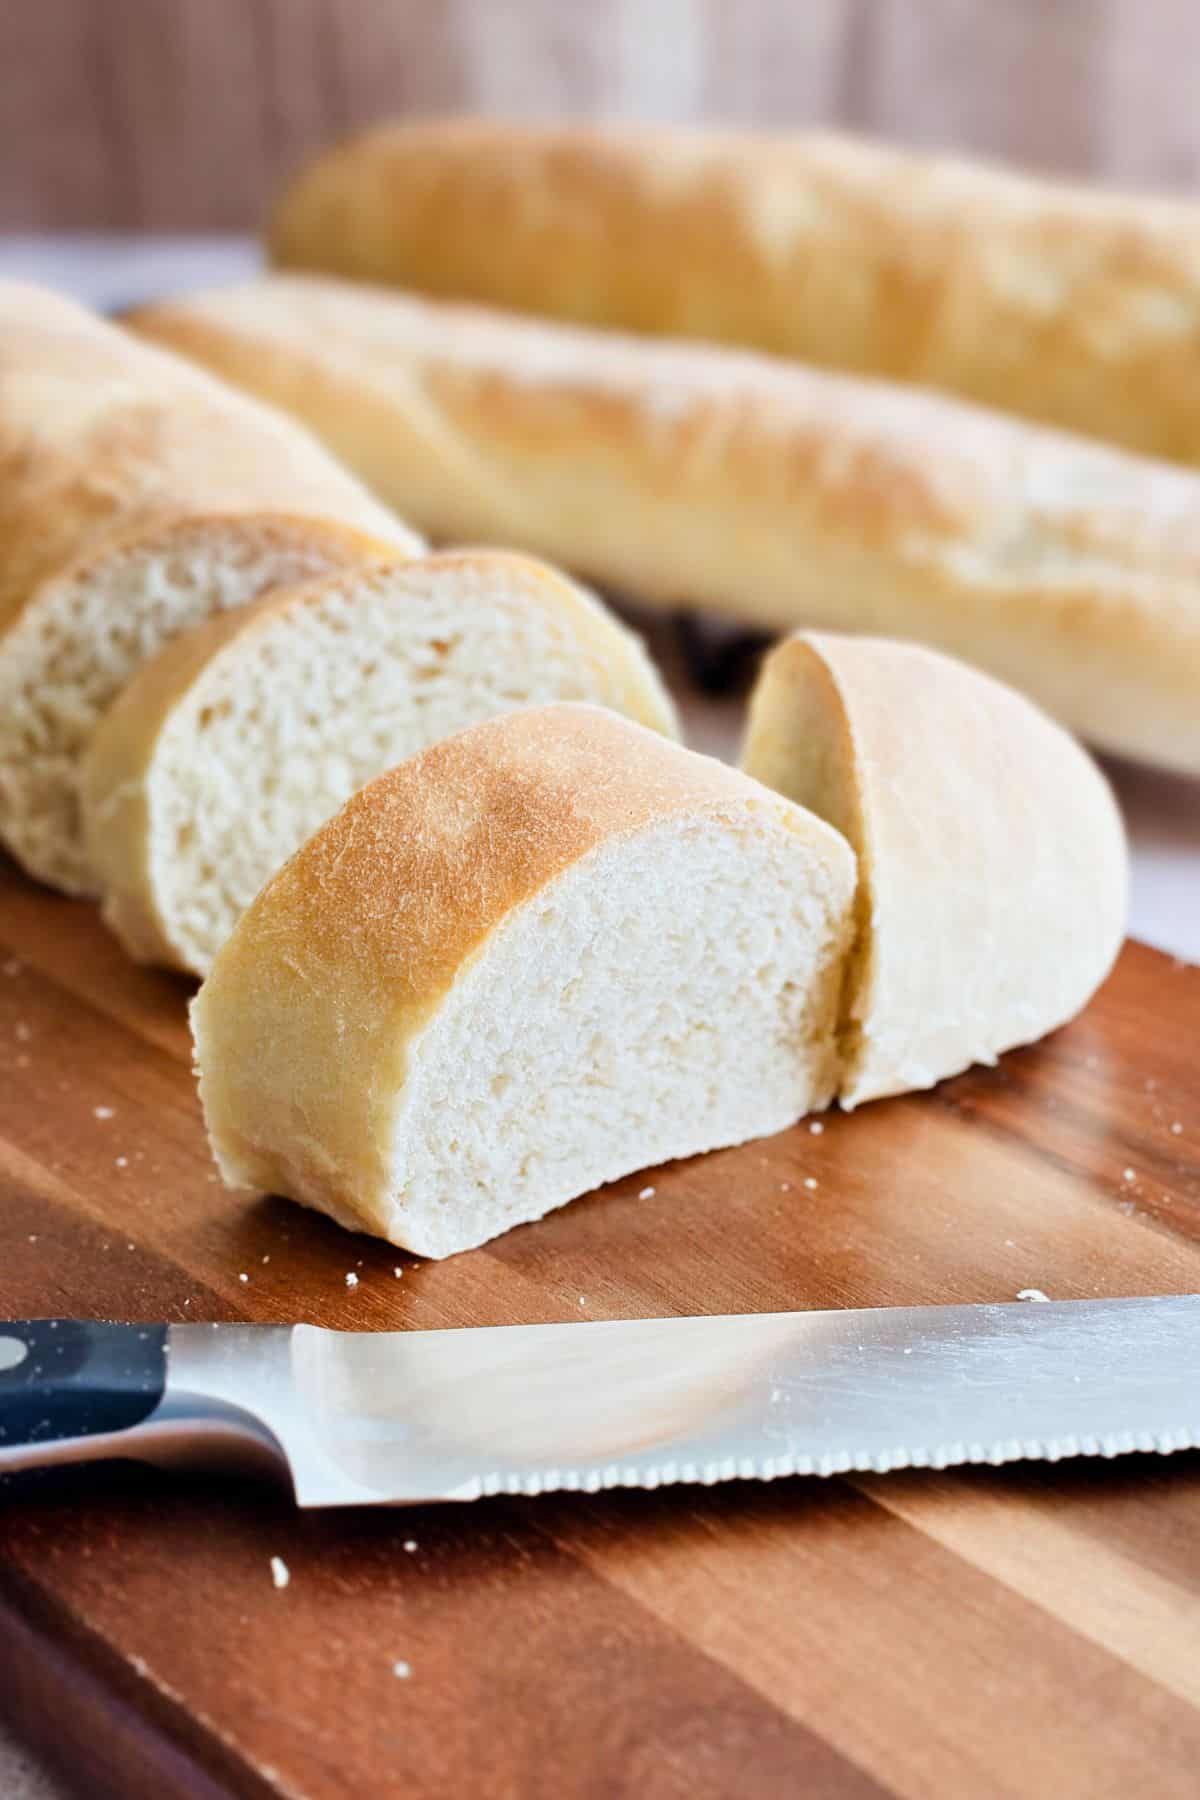
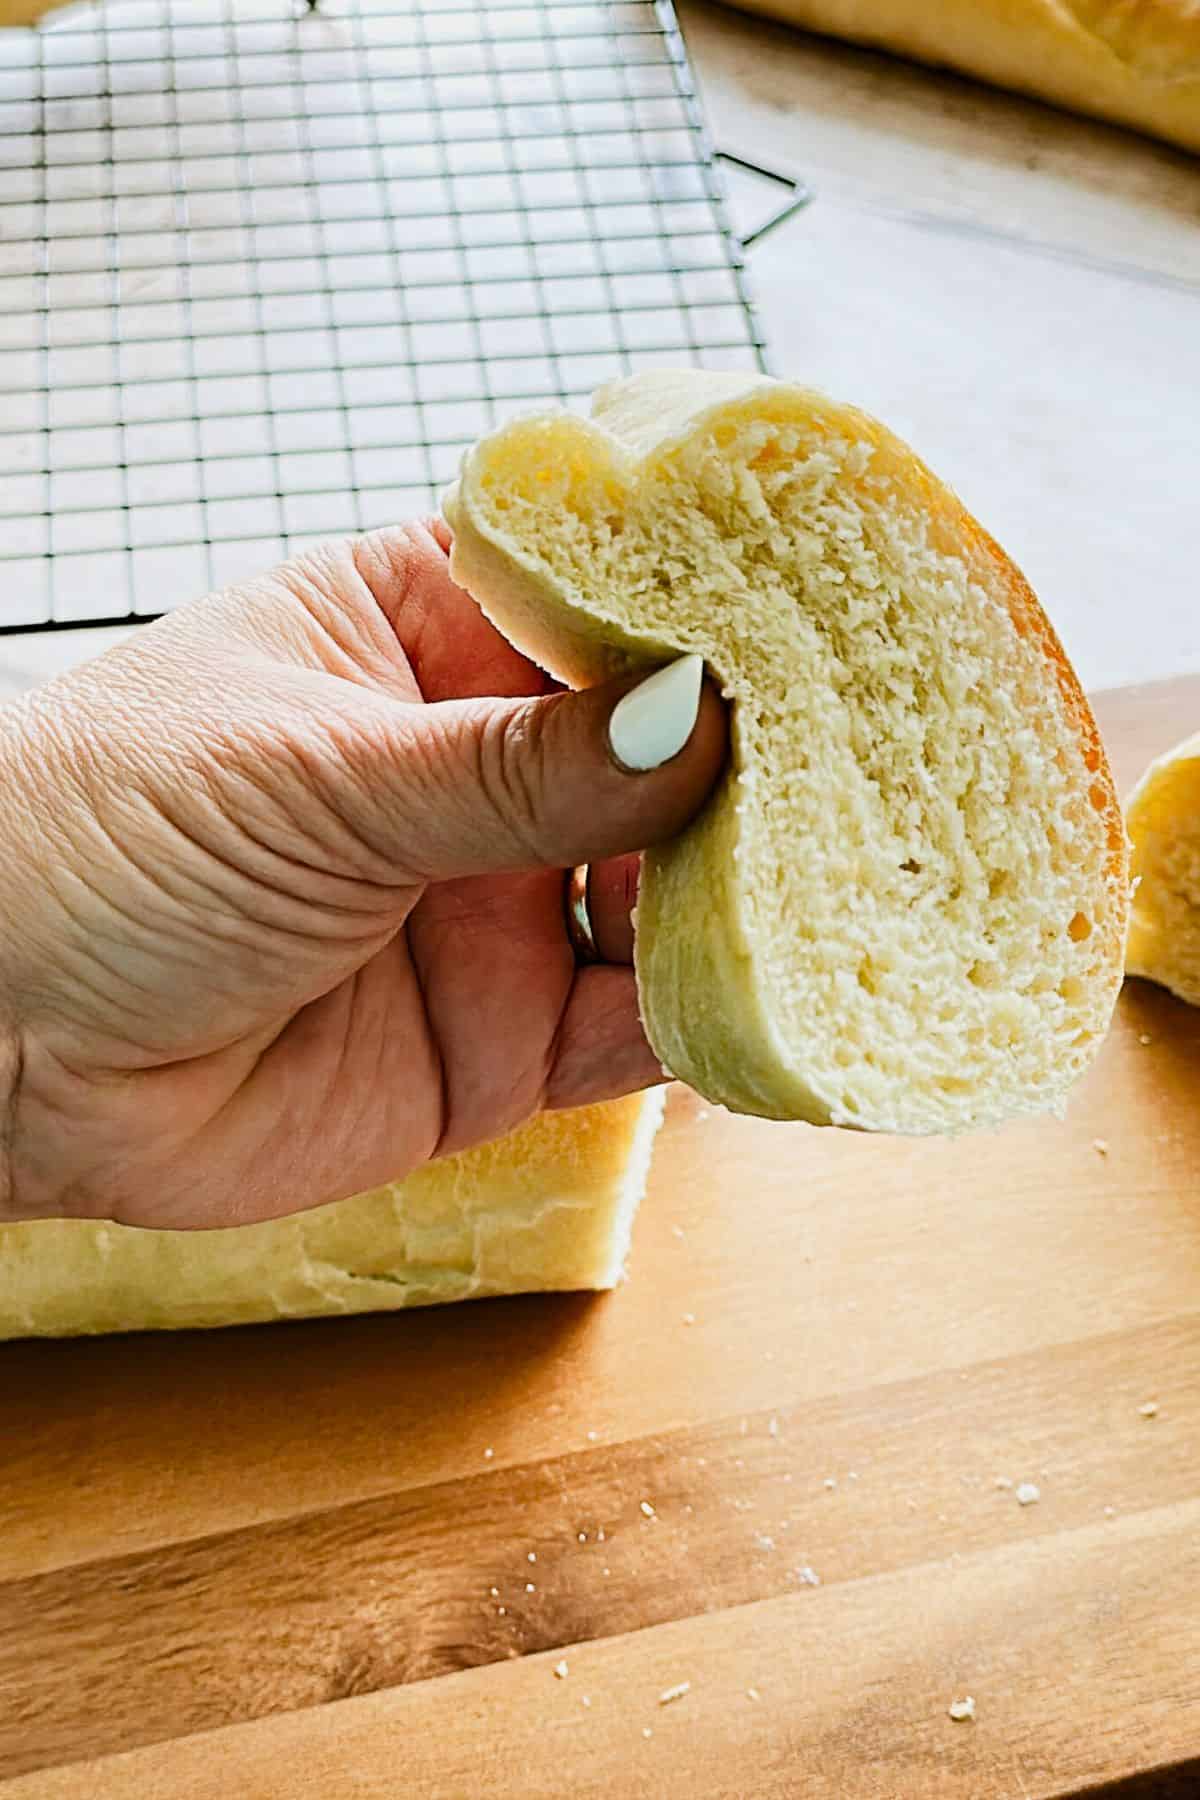
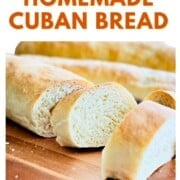
This homemade Cuban bread recipe is soft and fluffy inside, with a thin golden crust. It's the bread behind iconic Cuban sandwiches and perfect alongside Quick Cuban Black Beans or dipped in your Café con Leche.
This turned out really well! Great crust, texture inside, and flavor! -Zach
Growing up in a Cuban family in Miami, bread was the thing you ran to the bakery for early in the morning, the thing that held together a perfect Cuban sandwich, and the thing you had to eat fast before it went stale by the next day.
My mom was a bread-a-holic, so things like Cuban Crackers (Galletas Cubanas) and Cuban bread (pan Cubano) were often on the table to dip in dishes like Picadillo or Fricase de Pollo. Back then, those meals weren't vegan, but these days I make plant-based versions of all of them, and they're just as comforting (check out my Vegan Picadillo and Cuban-Inspired Fricase!)
But Cuban bread is traditionally made with lard, which doesn't really fly in my kitchen these days, so I've adapted the recipe into a vegan recipe that gives you all the flavor and fluffy texture without the pork fat.
I also find that the prefermentation the day before making the bread is the best technique for Cuban bread, rather than one-day recipes.
It gives the yeast time to slowly metabolize sugars and produce organic acids and alcohols, which creates that unique, subtle tang of Cuban bread and a more complex flavor.
My experience is that if you mix everything at once, the bread can taste flat or one-dimensional.
So give this recipe a try and let me know what you think in the comments. I think you'll find that you don't need to live in Miami or Tampa near a Cuban bakery to enjoy Cuban bread at home!
Thank you to many recipes I've tried, but especially La Cocina de Tori for guiding me toward making this delicious version at home.
Jump to:
Some Cuban Bread Facts
- Spain's roots - Breadmaking in Cuba got its style points from Spain, especially Galicia and Andalusia. They weren't shy about slipping in a bit of lard (manteca), which gave their loaves thin, crisp crusts and airy interiors.
- 19th-century migration - In the mid-1800s, Cuban immigrants settled in Florida, particularly in Key West and later in Tampa (Ybor City), where my maternal grandmother's family settled. Along with cigars and café, they packed their bread traditions in their suitcases.
- Tampa's claim - Because of this, Cuban bread became the bread of Tampa's thriving Cuban, Spanish, and even Italian communities who worked in the cigar industry. In fact, Tampa claims the title of "Cuban bread capital," especially with the founding of La Segunda Central Bakery in 1915, which is still famous for its loaves. They're known for laying a palmetto leaf across the dough before baking, which creates the signature split down the middle.
- Miami's version - Miami bakeries also make Cuban bread, but Tampa's is older. Some Miamians argue theirs is the authentic Cuban style, making it lighter and a bit different in texture, which fuels a fun rivalry (much like their rivalry over the most authentic Cuban sandwich).
- Cuban bread is also known as 'pan de manteca,' literally "lard bread." Yep, pork fat is the secret weapon that makes it so tender and tasty. That's why it's not your average French or Italian loaf, which uses just flour, water, yeast, and salt. These days, modern (and vegan) bakers like me swap in oil, shortening, or vegan butter to get the same soft interior and crispy crust
with a slightly different (but still delicious) flavor.
Why I Love This Recipe
- Creates a bakery-flavor bread at home -similar to the technique I use in my homemade cinnamon raisin bagels, where a simple dough and proper shaping make all the difference.
- This version uses plant-based ingredients for the same fluffy texture and crisp crust.
- Just pantry basics (flour, yeast, fat, sugar, salt) make the magic happen.
- Ideal for sandwiches, dipping into café con leche, or soaking up beans and stews.
- The preferment is an extra step, but the process is still straightforward and beginner-friendly.
What Makes Cuban Bread Different?
Cuban bread stands apart from other white breads in a few specific ways. The dough is softer and more enriched than a French baguette - traditionally made with lard, which gives it a tender, slightly chewy crumb. The crust is crackly and light, not thick like Italian bread.
The shape is intentional too. Cuban bread is wide and flat, designed to be pressed - which is exactly why it's the bread of choice for a Cuban sandwich. It holds up under the weight and heat of a press without getting soggy or falling apart.
It also stales faster than most breads, which is why it was traditionally baked fresh daily in Cuba and Tampa. Best eaten the same day. Second best: toasted.
Ingredients
This is all you need to make a delicious homemade Cuban bread.
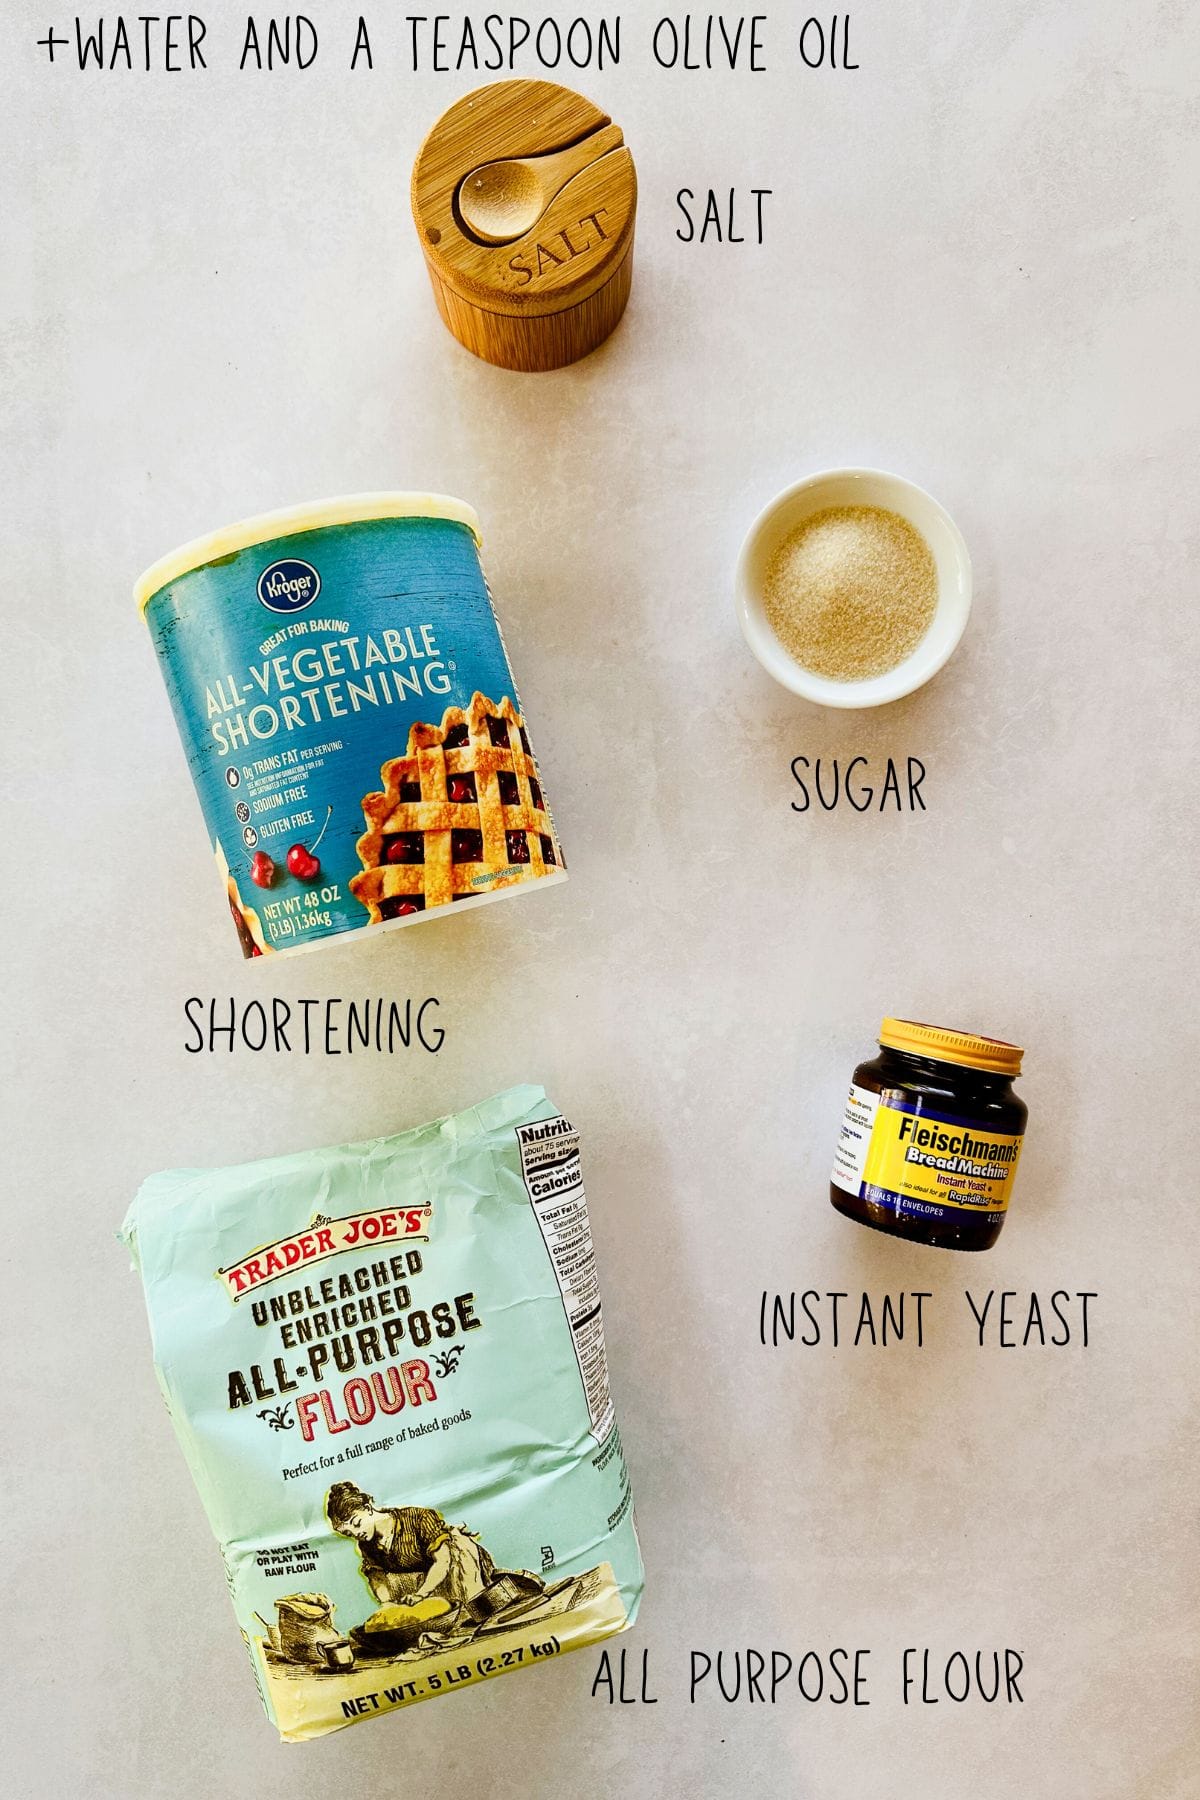
Yeast: Make sure to buy instant yeast. Active yeast will still work, but the bread will not rise as much using this recipe as your guide.
Vegetable Shortening: I find that shortening gives it a great flavor. If you don't have any, use vegan butter or vegetable oil.
See the printable recipe card for quantities and a full list of ingredients.
How To Make Homemade Cuban Bread
I use a preferment (basically a mini starter made the night before) because I think it gives this vegan version more depth of flavor and a softer, fluffier texture.
It's one extra step, but it's quick, and I promise it's worth it. I also feel that letting it rise 3 times, while slightly time-consuming, creates the softest interior.
See the complete printable recipe card below for the details.
Preferment - Make this the night before
Think of this as a prestarter. It's also known as a sponge. It is just a simple mix of flour, water, and yeast made the day before to give the bread more flavor, rise, and a soft, tender texture. It's similar to a poolish, but even wetter, which makes it looser and extra bubbly.
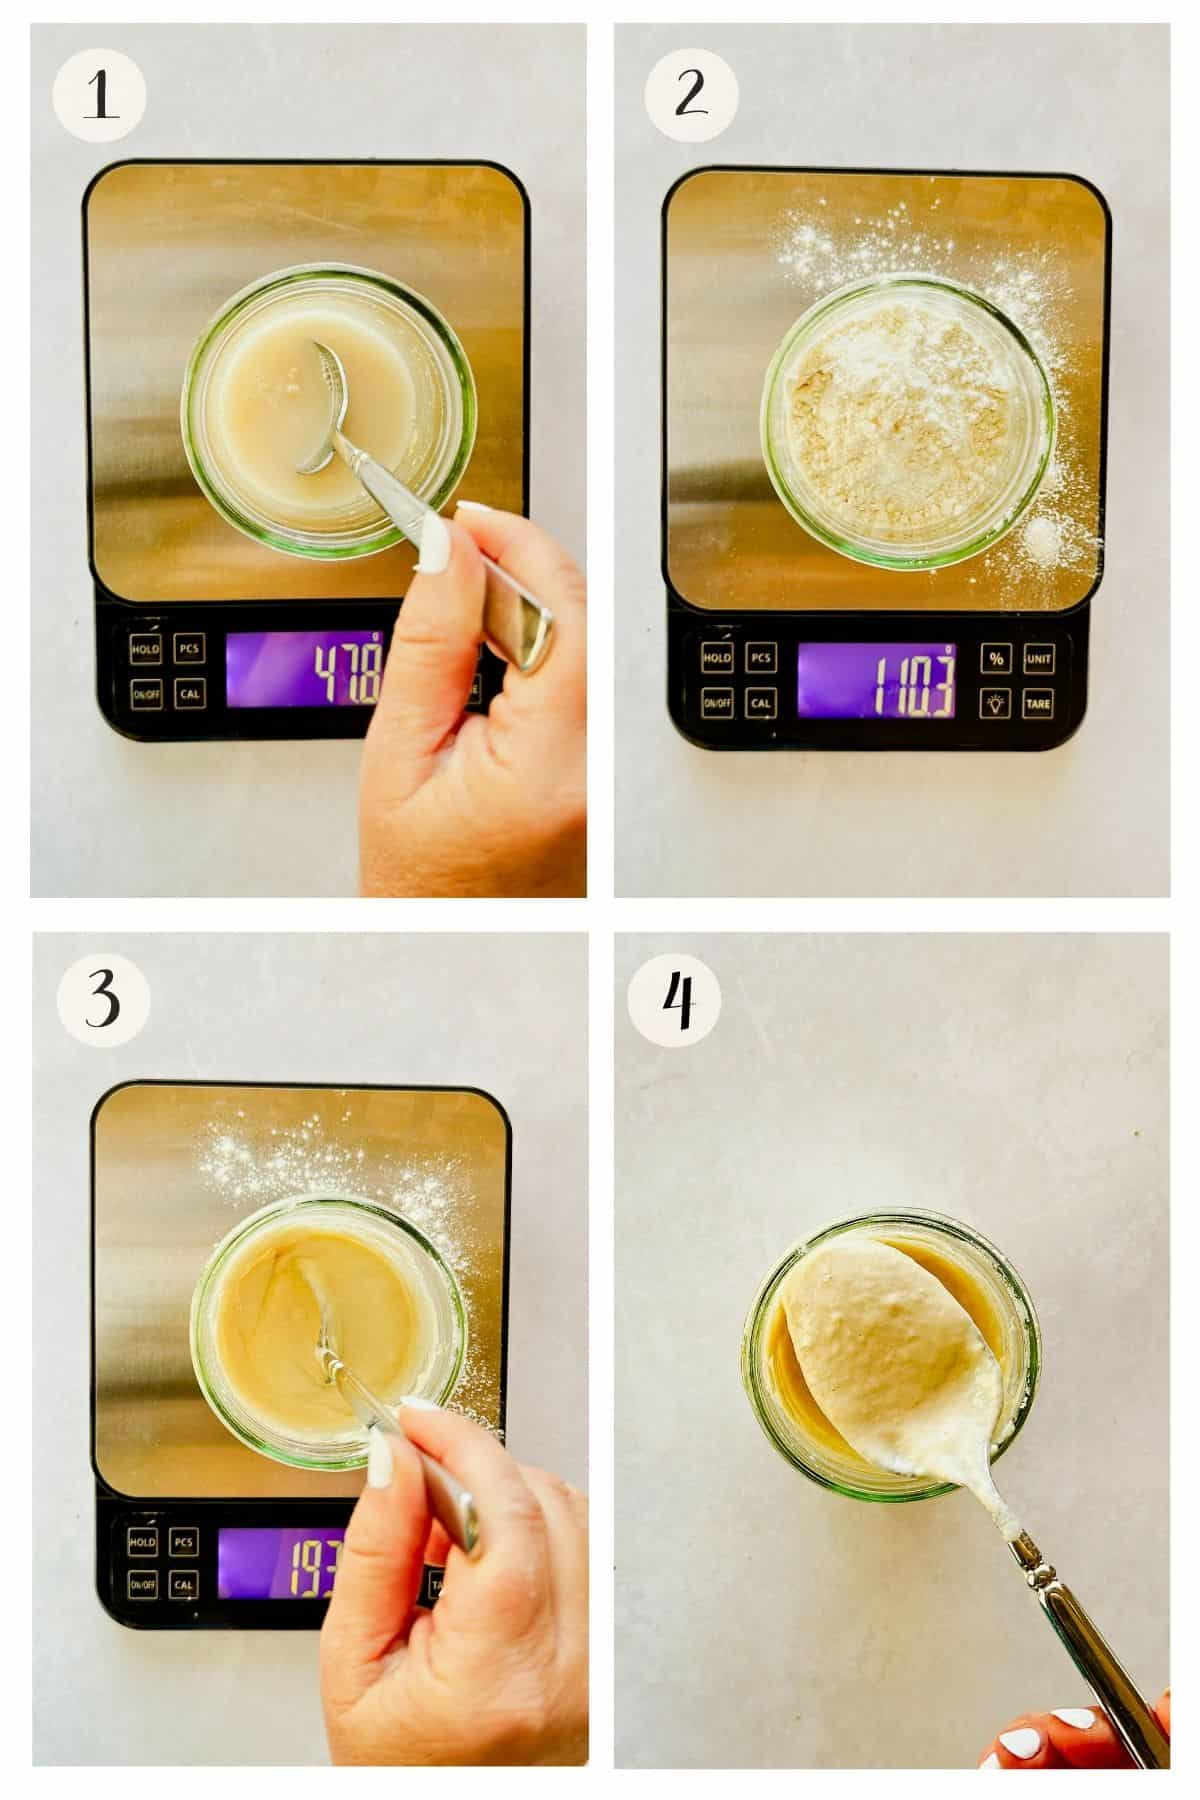
Step 1: Add 3 grams of instant yeast to 140 ml of warm water in a container. Mix well until dissolved.
Step 2: Add 110 grams of all-purpose flour to the container.
Step 3: Mix well until you get a smooth paste.
Step 4: Cover the container with plastic wrap and place it in the fridge overnight for 12-14 hours.
Next Day - Make Pre-Dough Mixture
This is like a slurry-style starter that helps wake up the yeast and evenly incorporate the sugar and fat before building the dough.

Step 5: Combine 300 ml of water and 3 grams of yeast. Stir gently to dissolve.
Step 6: Mix in 6 grams of sugar and stir well. Then add 20 grams of flour and mix well.
Step 7: Pour in 50 ml of melted shortening (heat it in the microwave for 45 seconds and let it cool before adding it).
Step 8: Use an immersion blender or whisk, mix everything into a creamy, lump-free batter. Let this mixture rest for about 10 minutes before making the dough in the next section. (Note that the mixture will look divided into a frothy top and liquid bottom - that is normal.)
Making the Dough
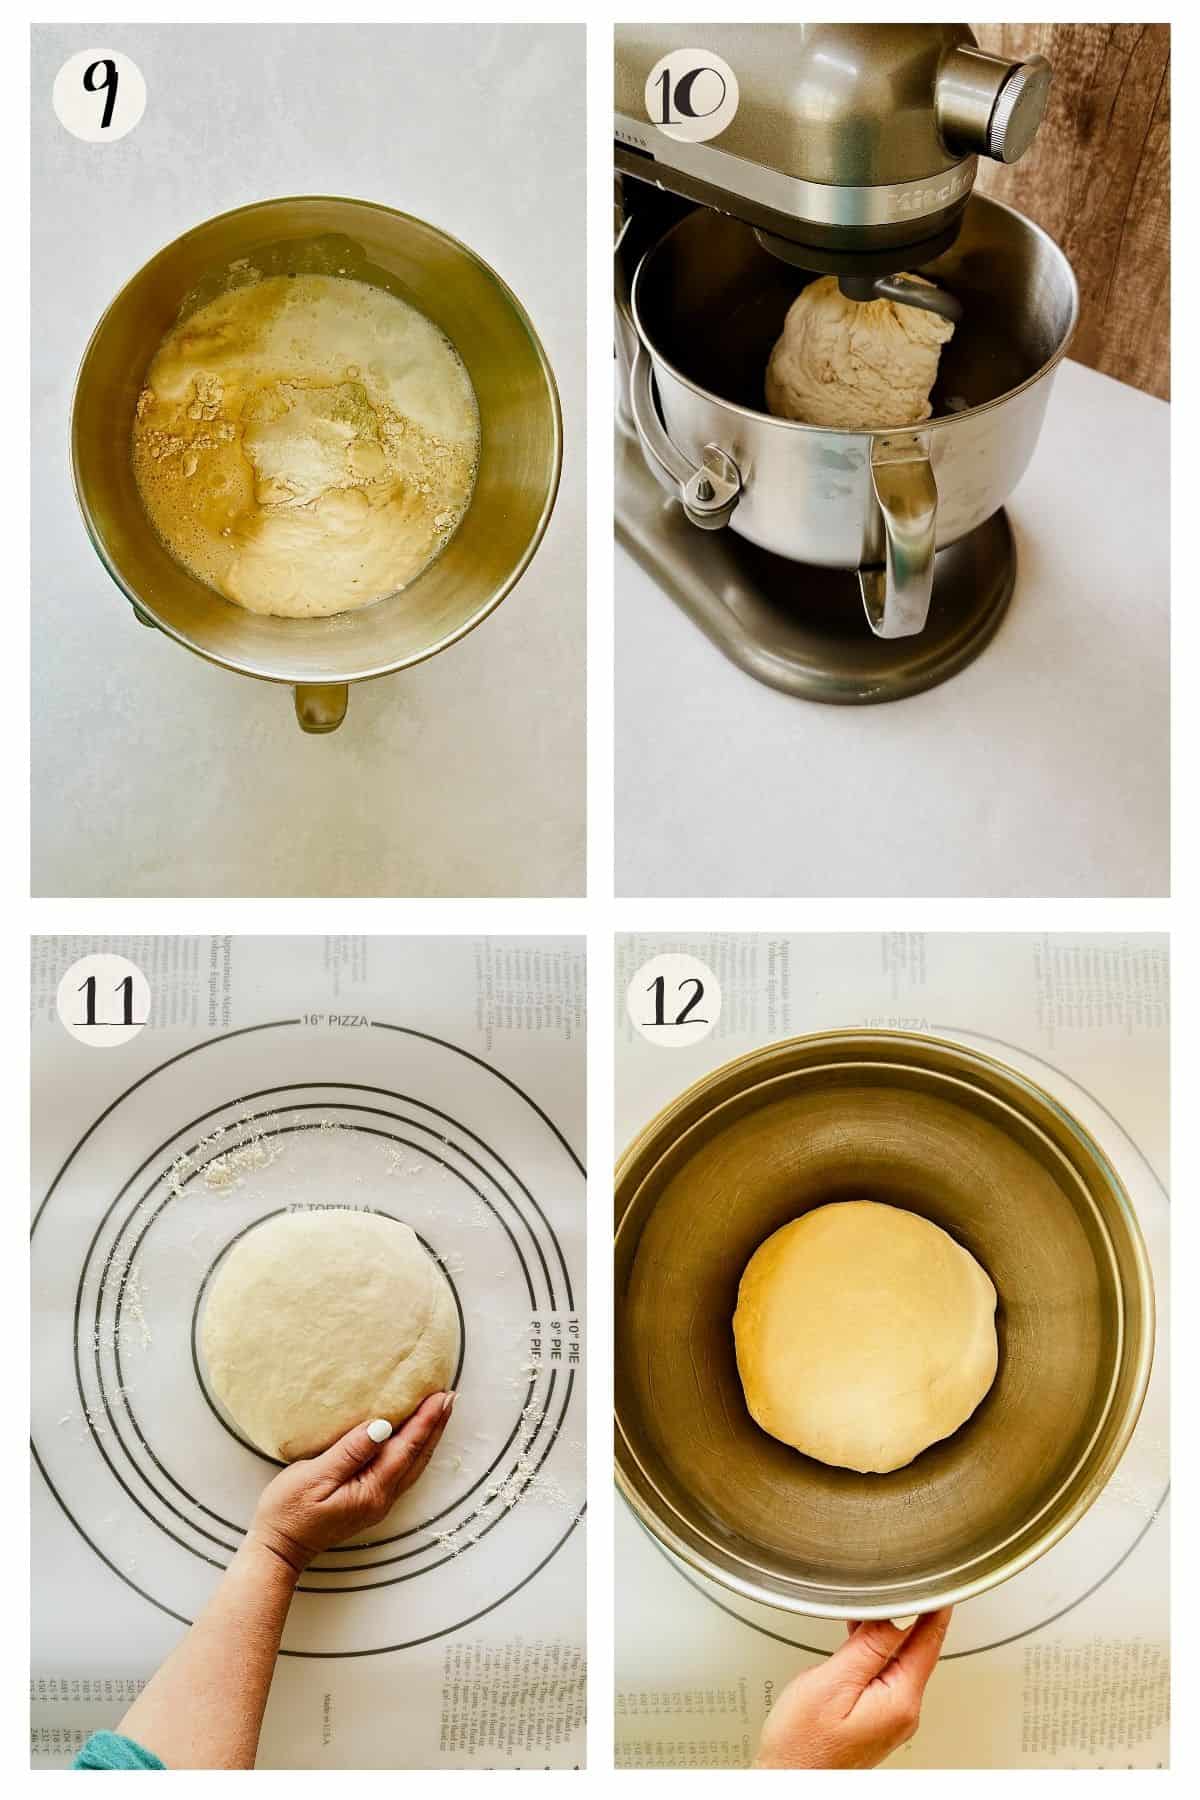
Step 9: Combine the preferment, pre-dough mixture, and 610 grams of flour in a large mixing bowl.
Step 10: Use a stand mixer with a dough hook and work the dough for 2 minutes. After 2 minutes, add 16 grams of salt (adding salt later helps the yeast get started and the gluten form more easily), then continue kneading until the dough is smooth, elastic, and slightly tacky - about 4 more minutes.
Step 11: Turn the dough out onto a lightly floured surface and work it a little more. Fold the edges in toward the center one at a time, like tucking petals into a flower, until the dough tightens. Keep folding until it starts to resemble a garlic bulb. Then flip it seam-side down and use your hands to gently cup and rotate it against the counter, smoothing the surface into a taut, round ball.
Step 12: Place the dough ball into a lightly oiled bowl (use the same one as the mixer for less cleaning), cover, and let rise until doubled in size. This should take about 1 ½ hours. I place mine in an UNHEATED oven or microwave.
Shaping the Dough
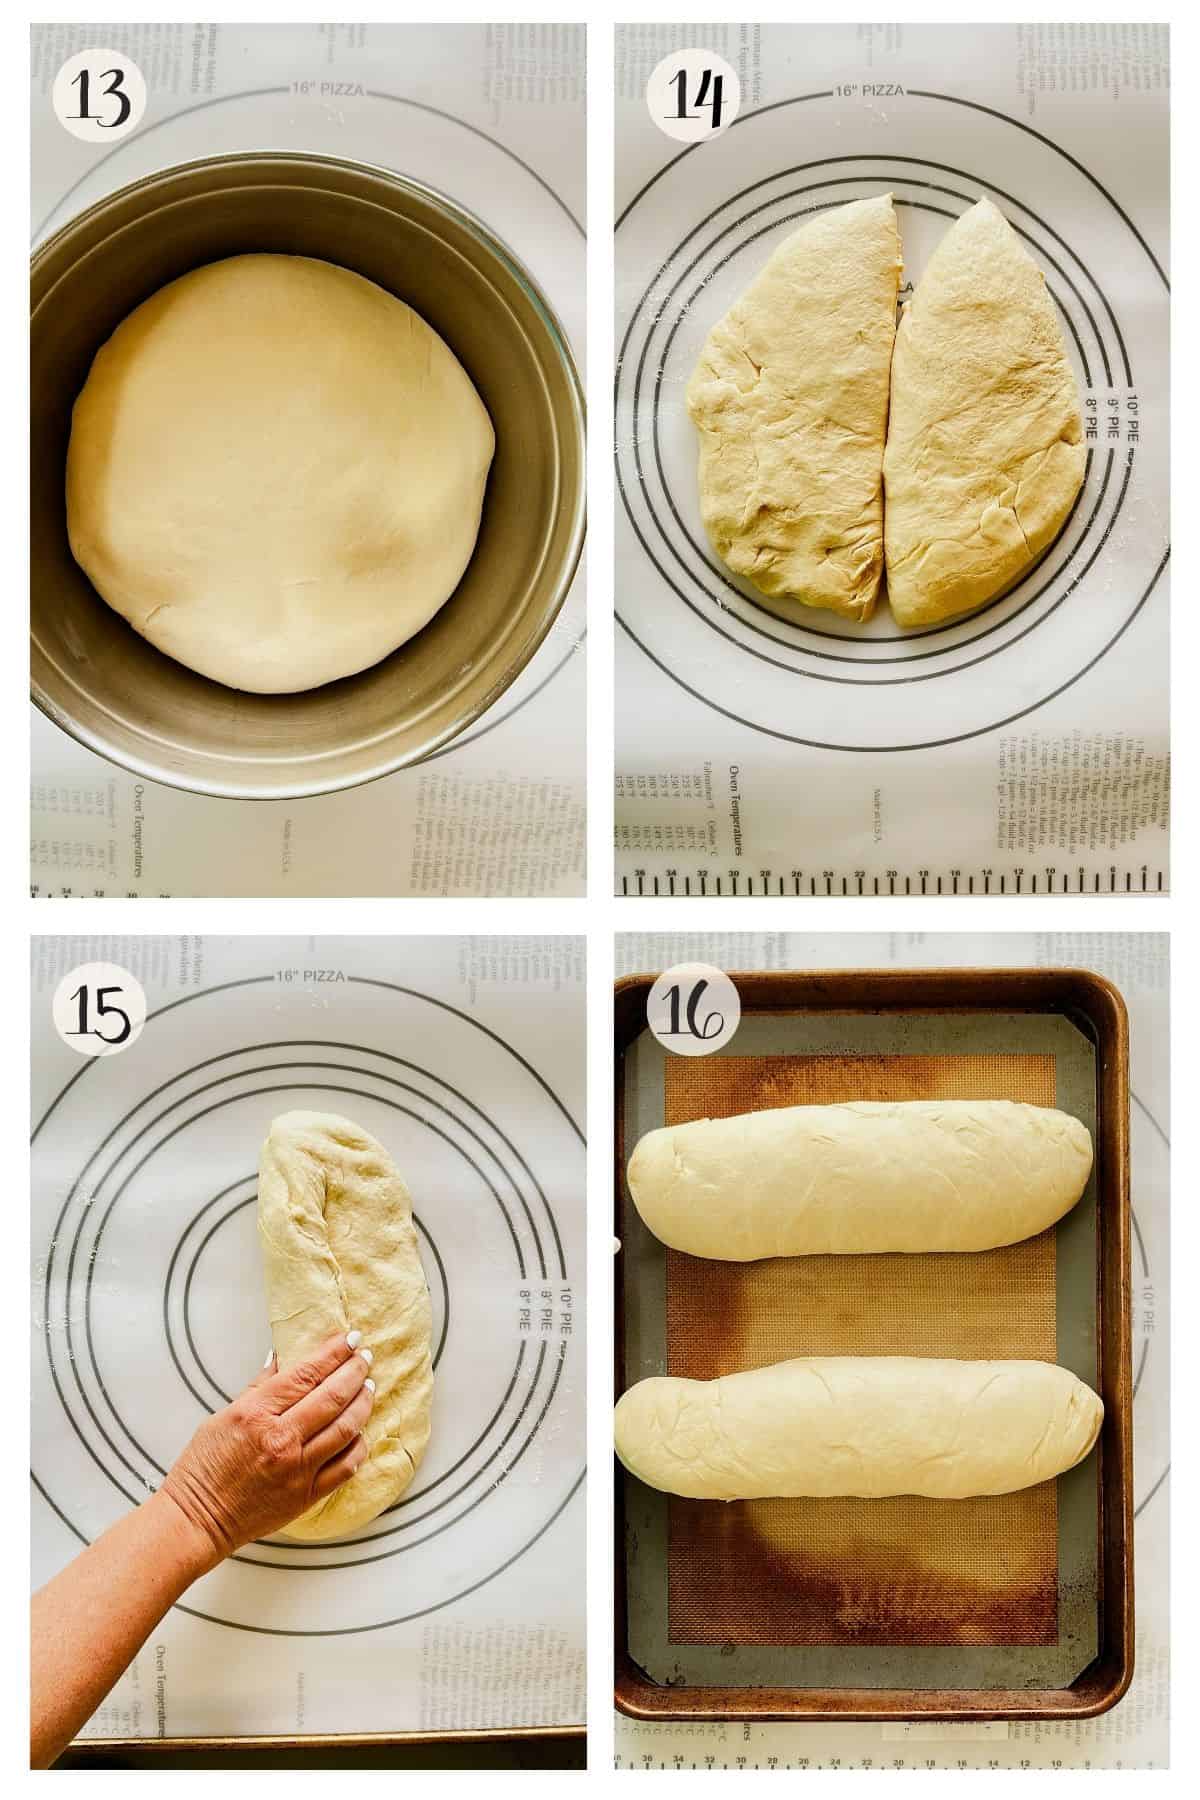
Step 13: Once the dough has doubled in size, gently deflate it with your hands and turn it out onto a lightly floured surface.
Step 14: Use a bench scraper or knife to cut the dough into two equal pieces.
Step 15: Working with one piece at a time, flatten slightly and shape into a rectangle as much as you can. Then fold and roll the dough into a log shape, pressing the seam closed with your fingers.
Step 16: Place the shaped loaves seam-side down on a baking sheet lined with parchment or a silicone mat. Cover and let rise until puffy, about 15 minutes.
Final Shaping and Baking

Step 17: Flatten each dough once more. Working with one piece at a time, use a rolling pin (or your hands) to gently flatten the dough into a rectangular shape as best as you can.
Step 18: Roll into a loaf shape by starting from the long side. This is the final shape the bread will take, so you want to roll the dough up into a log, pressing the seam closed with your fingers. Use your palm to pinch the sides closed, then roll the seam to the bottom.
Step 19: Finally, the third and final rise. Place the shaped loaves seam-side down on a lined baking sheet, leaving space between them. Cover and let rise until puffy and nearly doubled, about 1 hour and 15 minutes.
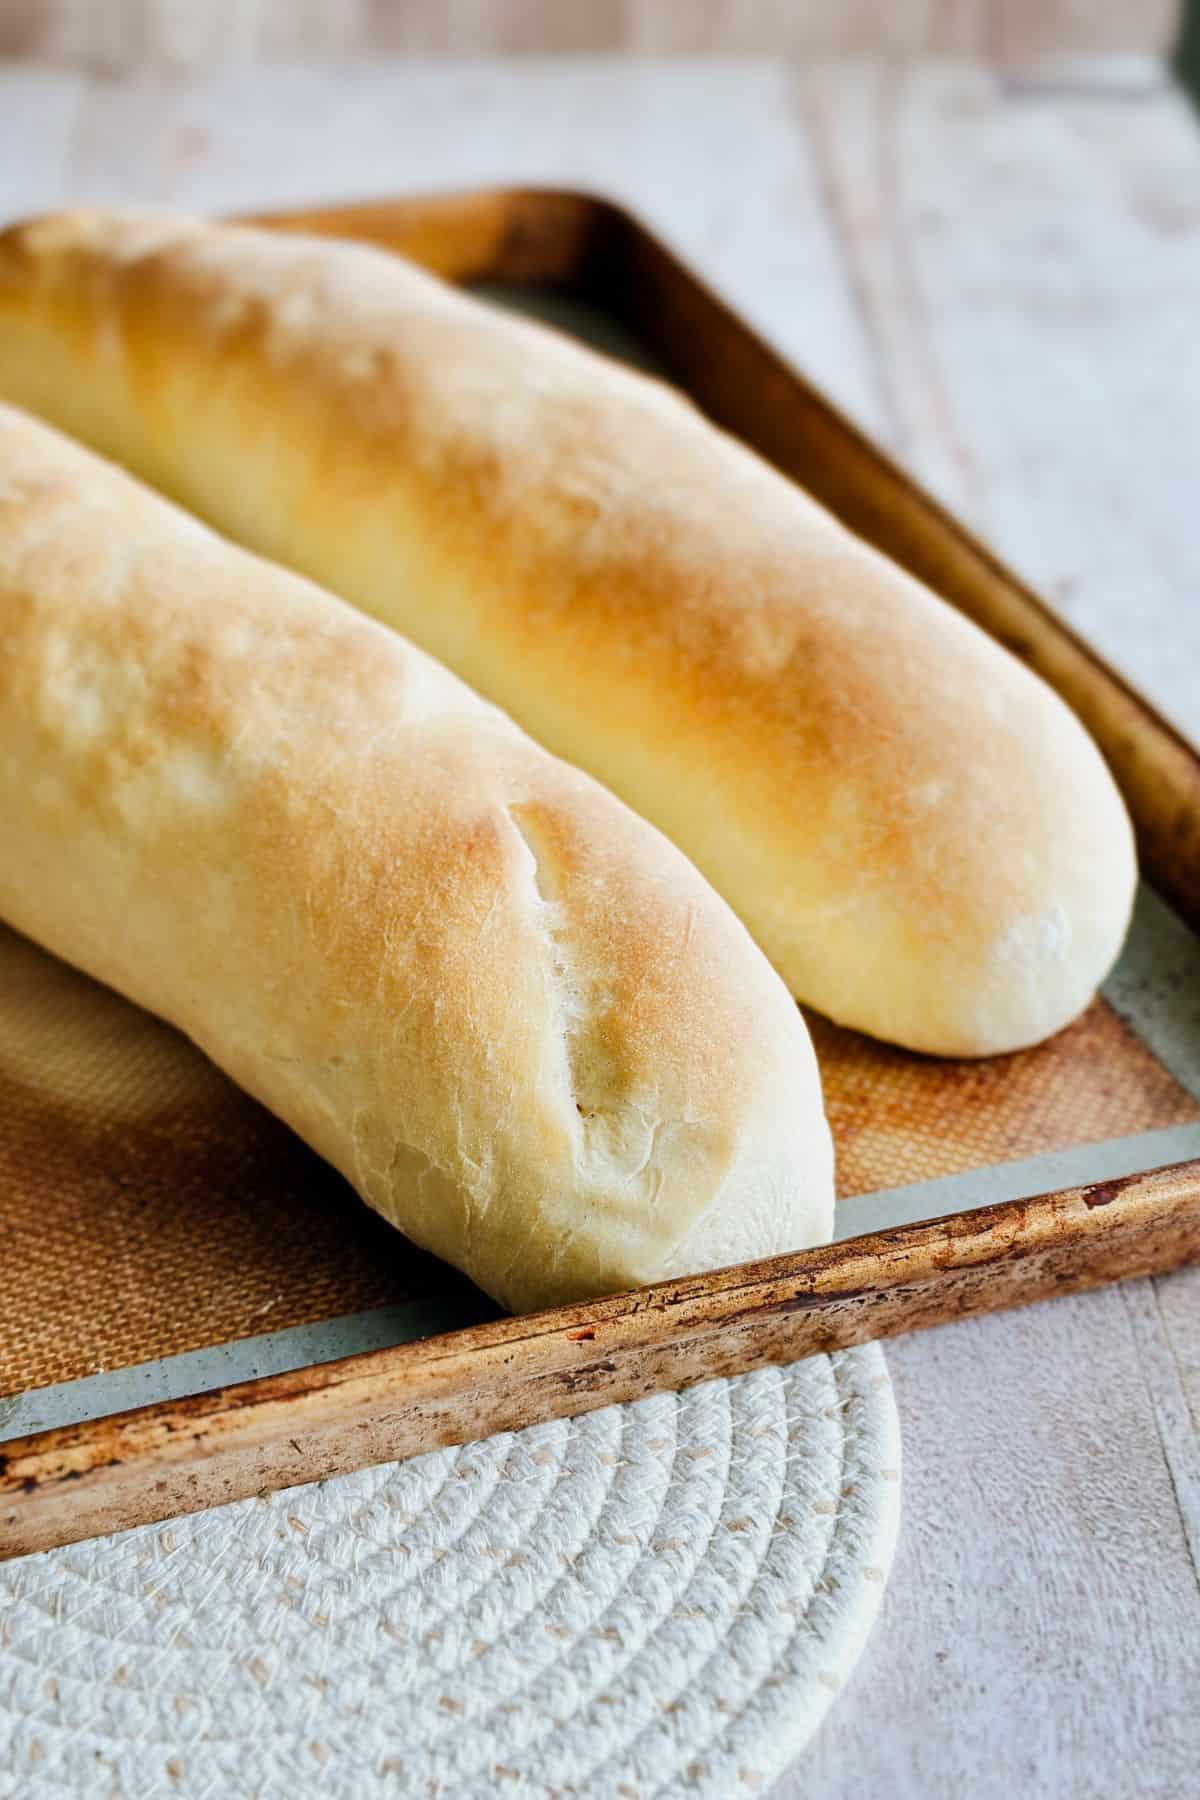
Step 20: Place a pan of hot water on the bottom rack of the oven to create steam. Bake the loaves on the middle rack for 20-25 minutes, or until golden brown. Let them cool slightly before slicing. Note: For the signature split line on top of Cuban bread (traditionally made with a palmetto leaf), use a sharp knife to lightly score the top of each loaf down the middle just before baking.
Top Tips
My number 1 tip by far when baking is using a scale, as it provides precise measurements that give the best results. I show you in the pictures and video how easy this scale is to use.
For the best Cuban bread shape, flatten the dough into a rectangle, then roll it up tightly from the long edge, sealing the seam with your fingertips or palm as you go. Pinch the final seam closed, press it into the dough with the side of your hand by your thumb, and place the loaf seam-side down so it bakes smooth with a perfect finish.
Steam for Cuban bread is essential for the perfect crust. You don't need much water to create steam - about 1 cup in a sturdy pan is plenty. Too much water keeps the oven humid for the whole bake and can leave you with a softer crust - not bad, just not what we are looking for. Add the hot water just before you put the bread in the oven so the steam works during the first 5-10 minutes, then let the oven dry out so the crust bakes up thin and crisp.
How to Use Cuban Bread
- Classic Cuban sandwich - Layer it with mojo-marinated mushrooms (or your fave vegan "ham"), pickles, mustard, and vegan cheese, then press until crispy. Serve Pastelitos de Guayaba (Guava Pastries) for dessert.
- Café con leche dunk - It's a Cuban tradition. Toast the bread, spread it with vegan butter, and dip it into a hot café con leche.
- Beans & rice companion - Perfect for scooping up black beans, picadillo, fricase, or served next to Moros y Cristianos (Cuban Black Beans & Rice).
- Simple snack - Layer with vegan butter or dip in some oil with a pinch of salt and fresh black pepper.
- Soup sidekick - Great with Cuban-style lentil soup, Lemony Brown Lentil Soup, or any cozy vegan soups and stews.
Cuban Bread Recipe FAQS
Yes! You can store the extra dough. In the refrigerator, it will keep for about 24 hours - just cover it tightly so it doesn't dry out, and let it come back to room temperature before shaping and baking. For more extended storage, freeze the dough right after shaping it into a loaf. Wrap it well, and it will keep for up to a month. When you're ready to use it, thaw overnight in the fridge, then let it rise until puffy before baking.
If you have leftovers, wrap the loaf tightly in plastic wrap and keep it at room temperature for up to 2 days.
If it starts to go a little stale, don't toss it! This Cuban bread is perfect for whipping up crispy Air Fryer Croutons!
You can knead the dough by hand or with a mixer. Both work just fine. The important thing is that it's kneaded well until smooth and no longer sticky.
Cuban bread has a super-thin, crackly crust, unlike the thick, chewy crusts found in French or Italian bread. On the inside, it is soft, fluffy, and almost melts in your mouth. Traditionally, it's made with lard (but I substitute it with shortening) to achieve that tender texture. The top usually has a seam from a palm frond or parchment strip laid on before baking, giving it its signature "Cuban bread look."
Steam! Placing a pan of water on the bottom tray of the oven or spraying the tops of the bread with a mist of water creates a crispy outside.


Don't leave me hanging! Drop a comment and tell me how this Cuban Bread turned out! Was it love at first bite? Surprisingly edible? Or a full-on disaster. And if my directions helped (or didn't), please let me know so I can continue to improve these recipes for you.
Follow me on Pinterest, Instagram, Facebook, and YouTube for inspiration.
Recipe Card

Cuban Bread Recipe - No Lard
Equipment
Ingredients
Preferment - For the Day Before
- 140 milliliters (ml) warm water ½ cup and 2 tablespoons
- 3 grams instant yeast 1 scant teaspoon
- 110 grams all-purpose flour 4 ounces
Pre- Mixture - For the Same Day as Dough
- 300 milliliters (ml) warm water 1 ¼ cup
- 3 grams instant yeast 1 scant teaspoon
- 6 grams sugar 1 ½ teaspoons
- 20 grams flour 2 tablespoons
- 50 milliliters (ml) vegetable shortening melt for 45 seconds in the microwave but let cool down a bit before using; ~4 tablespoons
For the Dough
- 610 grams all-purpose flour 4 cups, spooned and leveled* + 1 tablespoon
- 16 grams salt 4 teaspoons
Instructions
Day 1: Make the Preferment
- Mix and Chill: Stir yeast into warm water until dissolved (water should be 100-110°F or 37-43°C, like a warm bath). Add flour and mix into a smooth paste. Cover with plastic wrap and refrigerate overnight (about 12-14 hours).
Day 2: Make the Pre-Dough Mixture
- Combine: Dissolve the yeast in water. Then, stir in the sugar until blended. Add the flour and mix until smooth.
- Add Fat: Mix in melted shortening. Blend with an immersion blender (or whisk) until smooth. Rest 10 minutes. It will form a frothy top and liquid bottom, which is normal.
Make the Dough
- Combine: Remove the preferment from the fridge about 10-15 minutes before using to take off the chill. Then combine 610 grams of flour, the preferment, and the pre-dough mixture in the bowl of your stand mixer.
- Knead: Knead in the mixer with a spiral dough hook for 2 minutes. As it mixes, add salt and continue kneading for about 4 minutes, until smooth, elastic, and slightly tacky. The sides of the bowl will be clean.
- Finish by hand: Turn the dough out onto a lightly floured surface and knead it gently by folding it over itself a few times. It should be soft and smooth. To shape into a ball, fold the edges inward toward the center, like tucking petals into the center of a flour, until the surface tightens. Smooth it out, then flip it seam-side down and smooth it by rolling it around. Place in a lightly oiled bowl (or use the same mixing bowl), cover, and let rise until doubled in size, about 1 ½ hours.
Shape the Dough
- Divide Dough: Once the dough has doubled in size, punch it lightly down. Place on a floured surface and divide into 2 equal pieces.
- Roll: Flatten each piece a little bit into a rectangle as best as you can, but not too thin. Starting on the long edge, roll into a log, sealing seams with your fingers and you go along.
- Rise: Place seam-side down on a lined baking sheet, cover with a towel, and let rise until puffy for about 15 minutes.
Final Shaping & Baking
- Final Shape: Flatten each log again with a rolling pin or your hands into a rectangle that is about ½ an inch thick as best as possible. It should be a length that will fit on your baking pan. Fold and roll it tightly from the long side, sealing the seam with your fingertips or your palm. Flip seam-side down and gently roll to smooth and tuck in the seam as much as possible.
- Rise: Place seam-side down on a baking sheet. Cover and let rise for about 1 hour and 15 minutes or until nearly doubled. This is the third and final rise.
- Optional: After this third rise, lightly score each loaf down the center for the traditional Cuban bread split line.
- Prep the Oven: Preheat the oven to 400°F (205°C) with an oven-safe pan on the bottom rack. Once hot, pour in about 1 cup of water, then place the tray with the bread on the middle rack. The steam will help create a thin, crisp crust.
- Bake: Bake on the middle rack for 20-25 minutes, until golden brown. Cool slightly before slicing.
Alice says
Thank you for this! I live in Florida, and I find it difficult to make a good bread from recipes, perhaps because of the altitude/climate? This bread came out perfectly light and fluffy inside, delicately crispy outside, and much tastier than the "store" brand Cuban loaves. I made mine into sandwich buns this time around, but will do both next time.
Regi Pearce says
Thank you so much for leaving this nice note! I'm originally from Miami, and yes—Florida’s humidity can totally mess with bread, so I’m thrilled this one came out perfect for you. I love that you made sandwich buns. Can’t wait to hear how the full loaves turn out next time!
Zack says
This turned out really well! Great crust, texture inside, and flavor!
Regi Pearce says
So glad to hear that! Nothing beats that perfect crust and fluffy inside. Sounds like you nailed it! Thanks so much for trying the recipe!
Regi Pearce says
This bread is so close to the one I grew up with, but made vegan — no lard, just simple ingredients and lots of love.