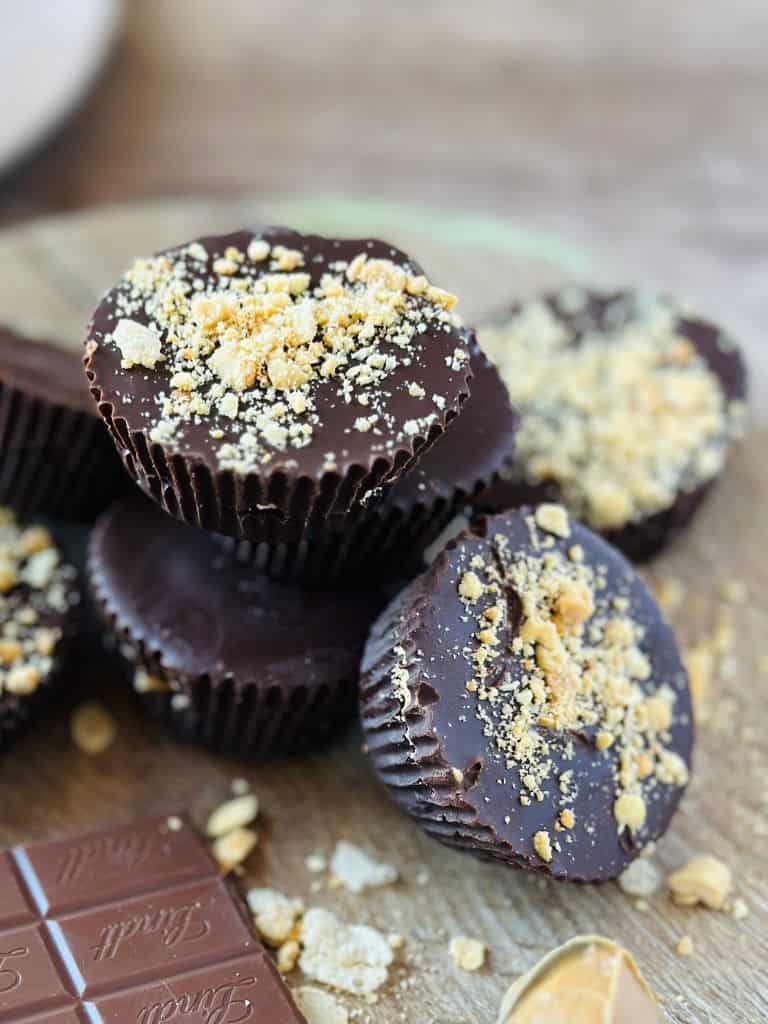
The combination of smooth chocolate and creamy peanut butter filling is simply irresistible - after all, they are two great tastes that taste great together. Indulge in vegan peanut butter cups, all while being dairy-free!

Traditional peanut butter cups, such as the popular brand Reese's, are not considered vegan because they contain dairy products, specifically milk chocolate. However, did you know that Reese's is now making a non-dairy version?! And they are really good!
Well these vegan peanut butter cups are an easy and delicious recipe to make at home—perfect for chocolate lovers, just like my Vegan Chocolate Peanut Butter Fondue or Vegan Chocolate Hazelnut Fondue.
Whether you’re a beginner or an experienced baker, this classic treat is simple to whip up and guaranteed to impress. Ahh, "peanut butter and chocolate together at last." ...I had to say it. So nostalgic.
Jump to:
Why You'll Love This Recipe
With many store-bought brands now making vegan peanut butter cups, you may want to make them at home for a few reasons.
- These vegan peanut butter cups are a no-bake treat, just like my Easy No-Bake Vegan Mini Cheesecakes.
- Making these at home is easy and fun! It’s a great hands-on activity to do with younger kids, too. My kids loved making homemade peanut butter cups (and a batch of Homemade Movie Theater Popcorn on the side) — and honestly, they still do!
- You have complete control over the ingredients used when you make vegan peanut butter cups at home. You can choose high-quality, organic, fresh, less sugar, and all-natural ingredients.
- Making these at home allows you to customize the flavors, textures, and fillings. You can experiment with different nut butter types and add ingredients like coconut shreds or dried fruits to create unique flavor combinations.
- If you or someone you know has specific food allergies or sensitivities, making vegan nut butter cups at home ensures they are safe to consume.
- Homemade PB butter cups can be more cost-effective than store-bought options, especially if you buy ingredients in bulk or on sale.
Ingredients
Here's what you'll need to make these homemade vegan peanut butter cups. See the recipe card for measurements.

- Chocolate: Expand your options beyond dark chocolate. There are numerous delicious choices, from Lindt's oat milk chocolate bars to Enjoy Life's delightful semi-sweet chips.
- Chocolate chips are more cost-efficient than buying bars.
- Nut butter: Choose any nut butter that fits your dietary needs and whether you want a natural or already sweetened version. If you choose a natural peanut butter with no added sugar, consider adding a sweetener like maple syrup and a dash of vanilla for a little natural sweetness.
Variations
- While peanut butter is a classic choice, you can experiment with nut butter like almond butter, cashew butter, or even hazelnut butter.
- Try different varieties like dark chocolate, semi-sweet chocolate, or flavored chocolate bars like mint or orange-infused chocolate. Gone are the days of limited options.
- Incorporate additional fillings. Add a sprinkle of sea salt, mix in crushed pretzels for a salty crunch, or add a dollop of raspberry jam for a fruity surprise.
- Get creative with toppings and decorations. Sprinkle coconut flakes or cacao nibs on top for added texture. You can also drizzle melted vegan white chocolate or create decorative swirls with dark chocolate.
- Instead of the traditional cup shape, experiment with different sizes and shapes. Make mini peanut butter cups using small molds or create peanut butter-filled chocolate balls for a bite-sized treat.
How to Make Vegan Peanut Butter Cups
These are simple to make and ready in just a few minutes. See the recipe card for details.
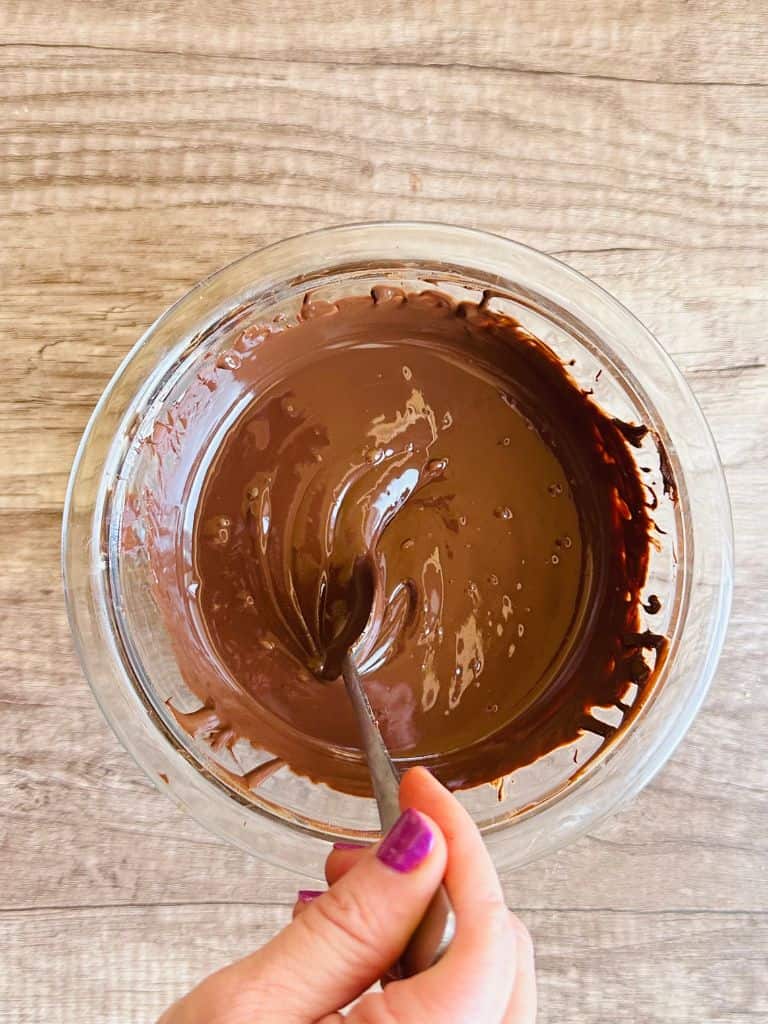
Step 1: Begin by melting your dairy-free chocolate using a microwave-safe bowl (or a double boiler). Melt it briefly, stirring in between, until the chocolate is smooth and fully melted. After the first minute in the microwave, I stir every 20 seconds until creamy and smooth.
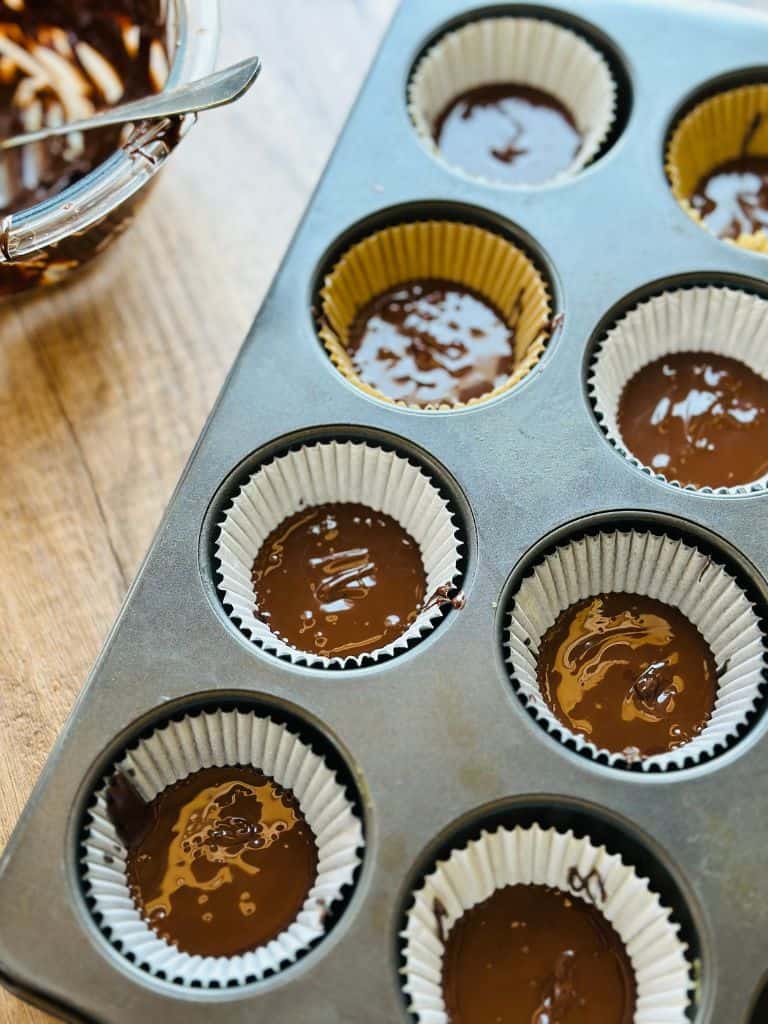
Step 2: Line a muffin tray with paper or silicone cupcake liners. Spoon a small amount of chocolate into the liners - about 1 tablespoon - ensuring the bottom is evenly coated but not too thick (or you'll end up with super thick PB cups that will require jaws of steel to conquer) and not too thin or you'll be left with lackluster treats that make you go, "Meh."... channel your inner Goldilocks here.
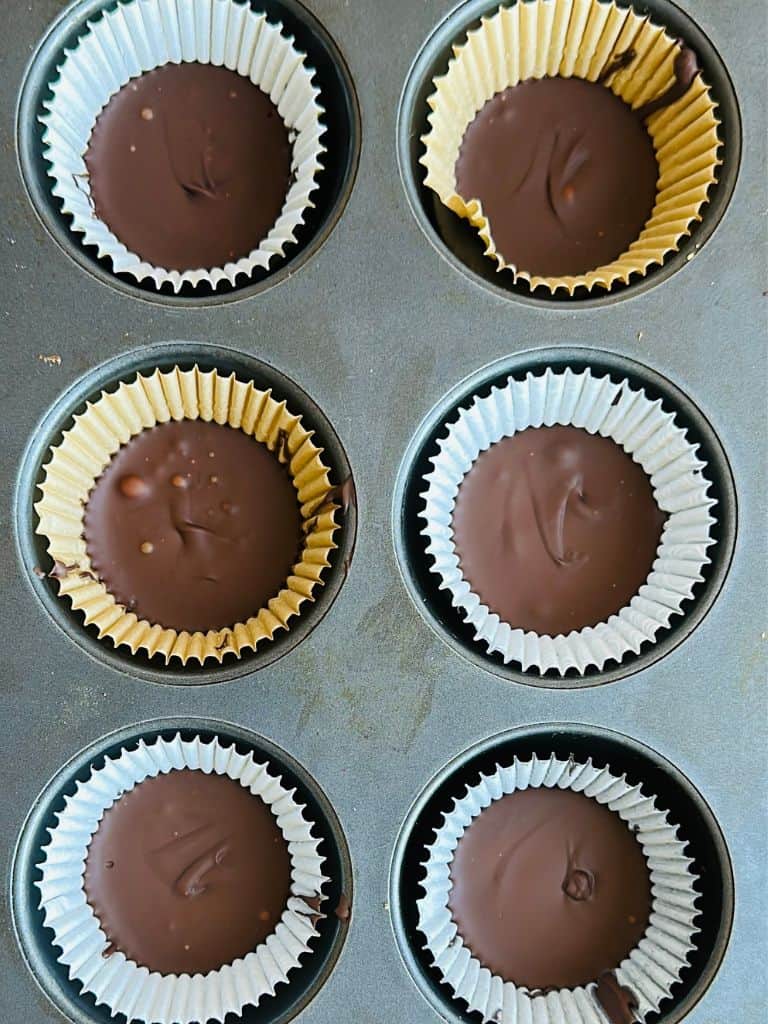
Step 3: Place the tray into the freezer for 10 minutes until the chocolate hardens.

Step 4: Place a dollop of the peanut butter filling (about the size of a marble) onto the chocolate layer, gently pressing it down to create a smooth and even surface. Add additional ingredients like crushed peanuts, rice puffs, or coconut shreds if desired.
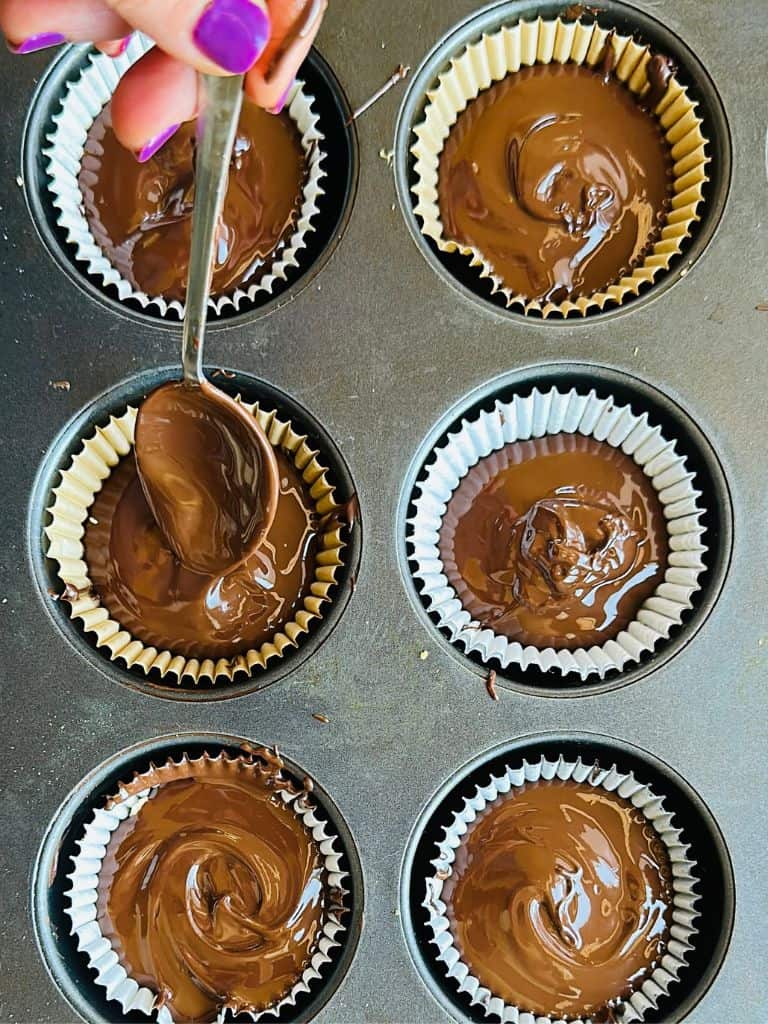
Step 5: Next, cover the filling with another layer of melted chocolate, ensuring it fully encases the filling. Top with extra crushed peanuts or coconut shreds.

Step 6: Place in the freezer again for another 10 minutes to set. Once set, remove the cups from the freezer. You can let it sit for a few minutes so it softens a bit.
Storing Homemade PB Cups
- Refrigeration: Refrigeration can help keep them firm. Place them in the refrigerator in an airtight container or cover them tightly with plastic wrap. Allow them to come to room temperature for a few minutes before serving.
- Freezing: To extend the shelf life of your vegan peanut butter cups, you can also freeze them. Wrap each peanut butter cup individually in plastic wrap or place them in a single layer in an airtight container or freezer bag. They can be stored in the freezer for up to a few months. Thaw them in the refrigerator or at room temperature before serving.

Recipe FAQS
Feel free to experiment with almond, cashew, or other nut butter for unique flavor variations.
Yes.This swap not only provides a similar taste but also offers added health benefits. Carob provides a naturally sweet, caffeine-free option for those with a different flavor profile.
When stored in an airtight container in the refrigerator, homemade vegan peanut butter cups can typically last up to two weeks. Enjoy them within this time frame for the best taste and texture.
Freezing homemade vegan peanut butter cups is a great way to extend their shelf life. Ensure they are properly wrapped or stored in an airtight container to prevent freezer burn.
If the peanut butter cups were refrigerated or frozen, let them sit at room temperature for a few minutes before serving to allow them to soften slightly. Your teeth will thank you for it.
More Delicious Vegan Snacks
Got a minute? I'd love for you to dive into the comments and rate this Vegan Peanut Butter Cups. Your feedback is invaluable—did you love it? Did you make any fun twists? Let me know how my directions worked for you so I can keep improving my recipes. Follow me on Pinterest, Instagram, Facebook, and YouTube for inspiration.
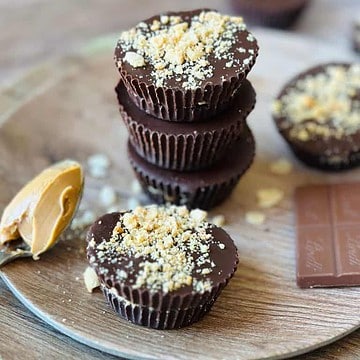
Vegan Peanut Butter Cups
Ingredients
- 2 bags dairy-free chocolate chips You probably will not use all the chips; they come in 9-10 oz bags depending on the brand
- ¼ cup peanut butter
- ¼ cup crushed peanuts optional
- ¼ cup puffed rice cereal optional
Instructions
- Prep the Liners: Line a muffin tin with 12 paper or silicone cupcake liners.
- Melt the Chocolate: In a microwave-safe bowl, melt one bag of chocolate chips. Heat the chocolate in 20-30 second intervals, stirring in between, until fully melted and smooth (around 2 minutes).
- Build the Base: Spoon about 1 tablespoon of melted chocolate into the bottom of each cupcake liner, ensuring the bottom is fully covered but not too thick. Place the muffin tin in the freezer for about 10 minutes to allow the chocolate to set.
- Add the Filling: Remove the muffin tin from the freezer and place approximately 1 teaspoon (the size of a marble) of the peanut butter mixture into each cup on top of the hardened chocolate shell. Add any additional ingredients if using.
- Seal the PB Cup: Then, spoon more melted chocolate over the peanut butter filling, ensuring it covers entirely. Smooth the tops with the back of a spoon. Top with crushed peanuts if desired or see post for other options.
- Freeze: Place the muffin tin back in the freezer for 10-20 minutes or until the chocolate has fully hardened. Once set, remove the peanut butter cups from the muffin tin and let sit for a few minutes on the counter to soften ever so slightly. Enjoy!





Regi Pearce says
These vegan peanut butter cups are rich, creamy, and perfectly sweet. I love how easy they are to make!