
100% Biga Neapolitan Pizza Recipe
Indulge in the authentic flavors of Italy with our Biga Neapolitan Pizza Recipe! Using biga as a pre-ferment, this dough offers a delicious taste and texture, resulting in a light and airy crust with a subtle chewiness that will transport you straight to the heart of Naples.
Ingredients
Biga Pre-Fermented Dough
- 1000 grams "00" Caputo Pizzeria Flour Blue
- 540 grams water
- 2 grams instant yeast
Pizza Dough
- 100 grams water
- 22 grams salt
- 22 grams diastatic malt Substitute with one tablespoon (or 20 grams) of maple syrup or date syrup
- 10 grams chilled water
Pizza Toppings
- vegan parmesan cheese as desired
- fresh basil as desired
- finely chopped garlic as desired
Pizza Sauce
- 1 can Cento San Marzano Organic Peeled Tomatoes
- 1 tablespoon salt
- 1 tablespoon finely chopped garlic
- 6 leaves fresh basil
- 1 tablespoon olive oil
Instructions
Biga Pre-Fermented Dough
- Combine yeast and water until yeast dissolves.
- Add flour to proofing tray.
- Add water/yeast mixture to proofing tray and lightly combine with fingers. DO NOT kneed the dough, you're going for a disconnected stringy consistency resembling loose noodles.
- Keep mixing until all the dry flour parts are incorporated (this is key as you don't want dry bits remaining in the mixture.
- Place the loose mixer into a bowl or vertical container. DO NOT leave the mixture in a wide container like the proofing tray to rest. Confining the dough in something more narrow will help it to continue combing over the resting period.
- Cover the bowl with plastic wrap or tightly fitting damp towel and rest for 12-14 hours until Biga doubles in size.
- After the resting period, Biga will have wonderful aromatic quality with small air bubbles and somewhat dense consistency.
Pizza Dough
- Combine water and salt, stirring until all the salt is dissolved.

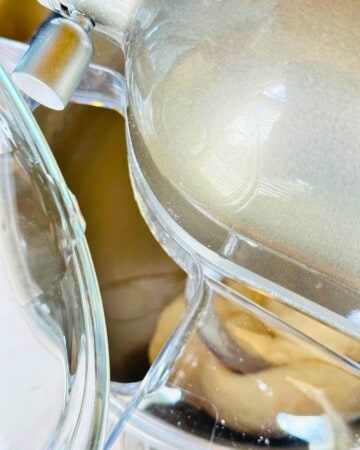
- Place Biga into the stand mixer with a dough attachment.

- Turn mixer on speed setting of 1

- Slowly add water/salt mixture in small increments just until the bottom of the bowl is wet. Once the dough absorbs the water at the bottom of the bowl, repeat the process and continue until all the water/salt mixture is incorporated into the dough.
- Slowly add the malt letting it combine into the dough gradually - DO NOT add all the malt at once.

- Add the chilled water and continue mixing until you have a silky and fully combined dough.
- Remove mixing bowl and cover with plastic wrap or tightly fitting damp towel and rest for 2 hours at room temperature.

- After 2 hours of resting at room temperature, move the bowl the refrigerator to cold rest for another 2 hours.
- Remove dough from refrigerator and rest at room temperature for 15 mins to let it soften.
- Weigh out 320 gram portions shaped into tightly kneaded balls and place into your clean proofing tray and seal tray tightly. You should have ~ 5 pizza balls.
- After 4 hours in the proofing tray, remove pizza balls 1 at a time, by gently using a spatula to separate the balls from each other and the walls of the proofing tray before sliding the spatula underneath the ball to remove.
- After your dough has risen, you'll want to handle it gently to keep those nice air bubbles inside. Instead of using a rolling pin, dust the dough ball with some flour and use your fingertips to gently press and stretch the dough from the center outwards, leaving the very edge a little thicker to create the crust. If you're careful and patient, pushing the dough out evenly without tearing or squishing it, you'll create a crust that's airy and light once it's baked.
- Dress your pizza with the pizza sauce, or use your own, as well as the cheese, garlic, and fresh basil.
- Gently slide, not lift, the pizza onto the pizza peel and give the peel a gentle shake (forward and backward) to ensure it's not sticking to the peel.
Pizza Sauce (can me made in advance)
- Combine 1 can of tomatoes, olive oil, salt, fresh basil, and salt into a blender and mix to desired consistency, usually
- Set aside
Baking in Ooni Pizza Oven
- Preheat pizza oven to ~800 °F to 900 °F for at least
- Transfer the pizza into the pizza oven for to , rotating ¼ turn as the edges of the pizza start to brown.
- Once the pizza is browned, removed pizza using the peel, garnish with any additional topping as desire, slice to your liking and enjoy!
Baking in Home Oven
- Preheat the oven to 500 °F with the pizza stone or pizza plate inside for at least
- Transfer the pizza into the oven for ~ . Check pizza for progress and continue monitoring until cooked. Cooking time will vary based on a number of factors so just keep an eye on it until your happy with the level of browning.
- Once the pizza is browned, removed pizza using the peel, garnish with any additional topping as desire, slice to your liking and enjoy!
Notes
Nutritional information is only an estimate for the dough. No toppings were included.
Nutrition
Calories: 655kcal | Carbohydrates: 133g | Protein: 18g | Fat: 4g | Saturated Fat: 1g | Sodium: 2691mg | Fiber: 6g | Sugar: 2g | Calcium: 56mg | Iron: 9mg
Tried this recipe?Please consider Leaving a Review!
